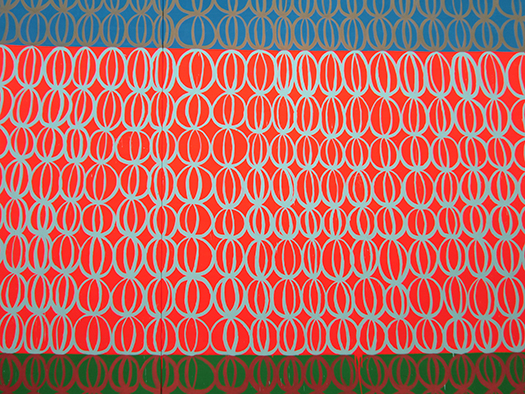
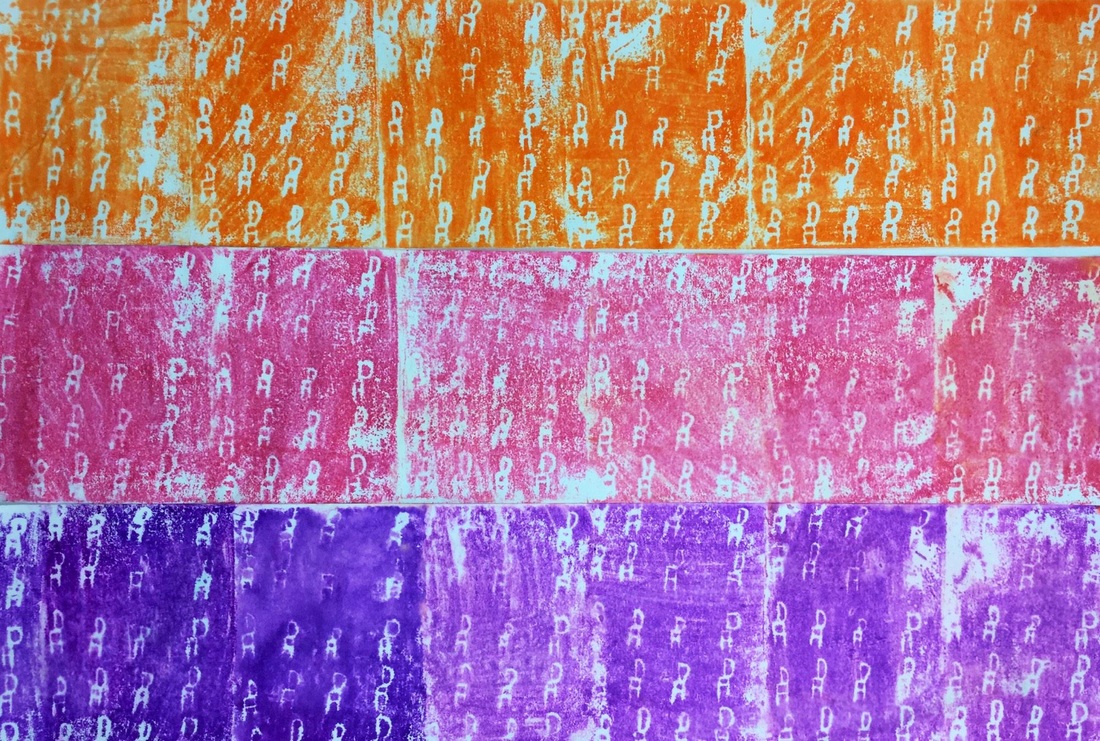
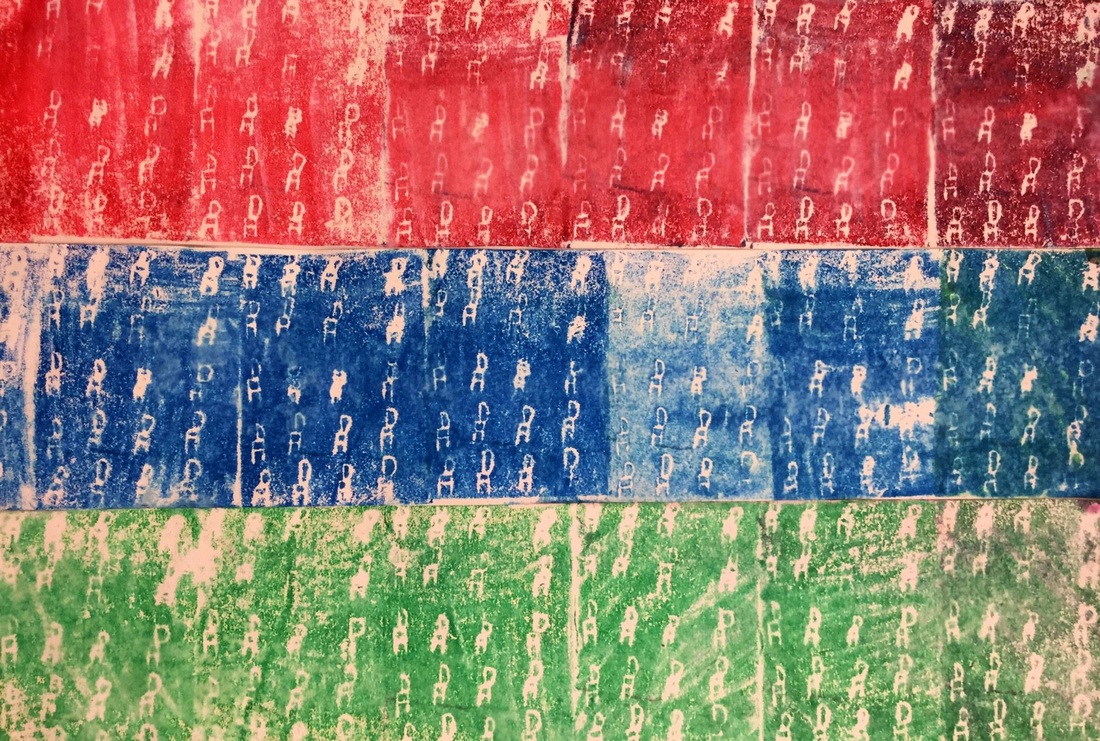
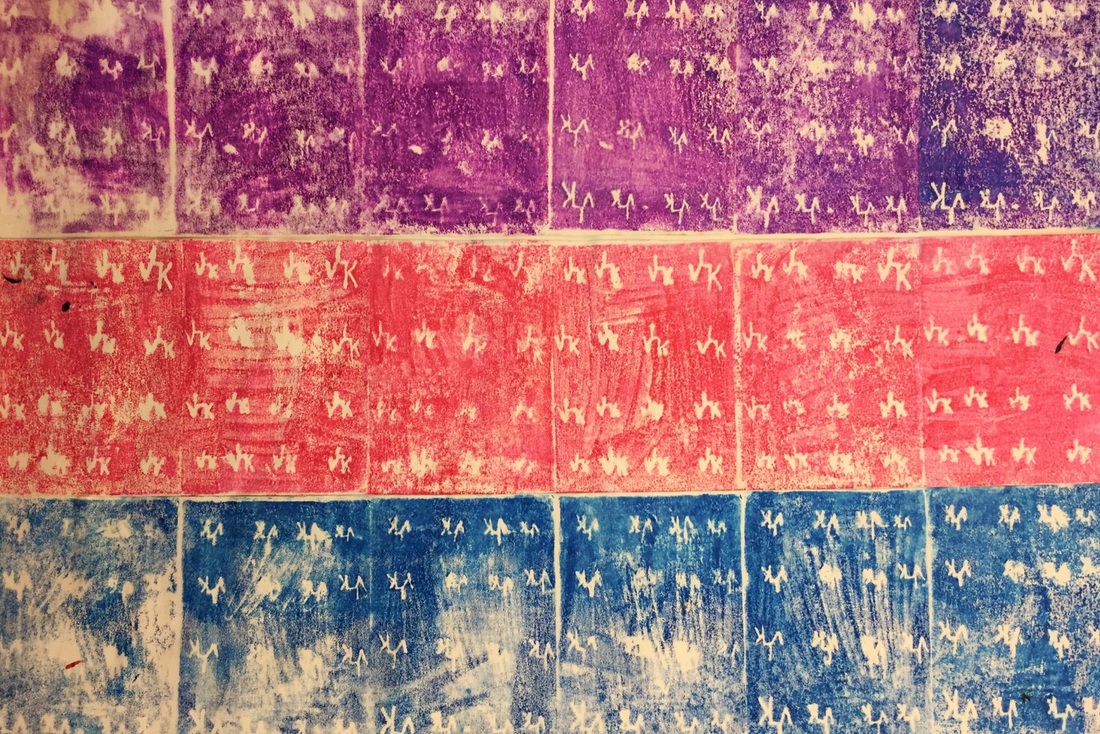
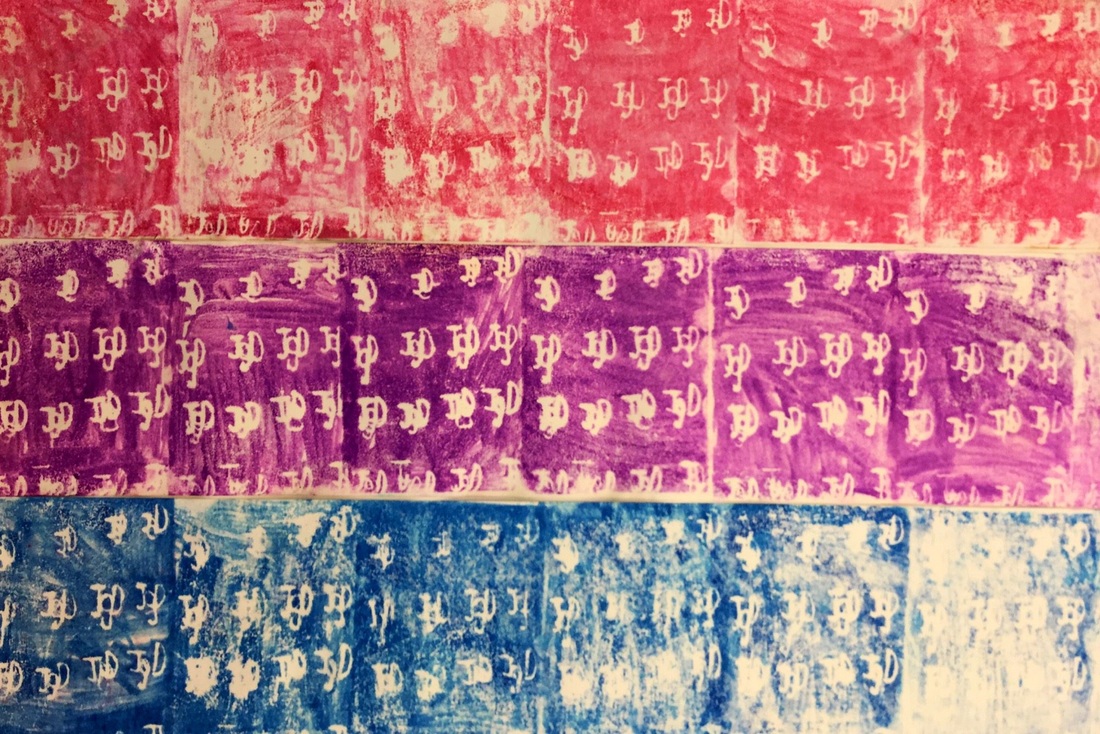
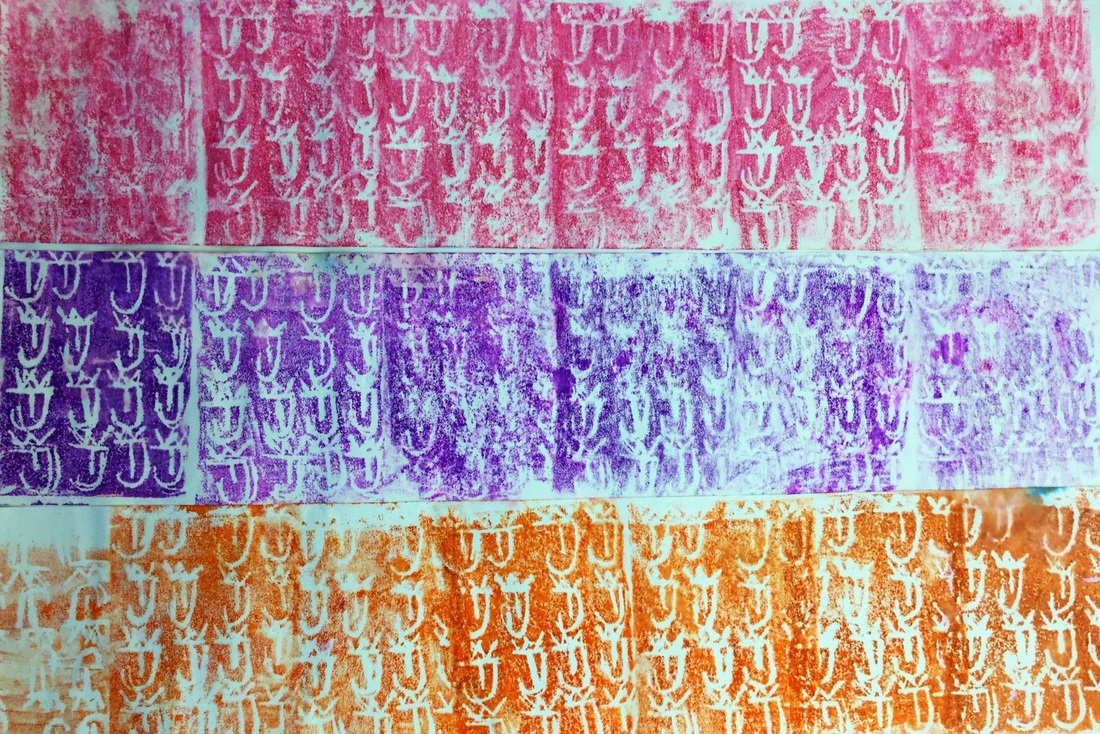
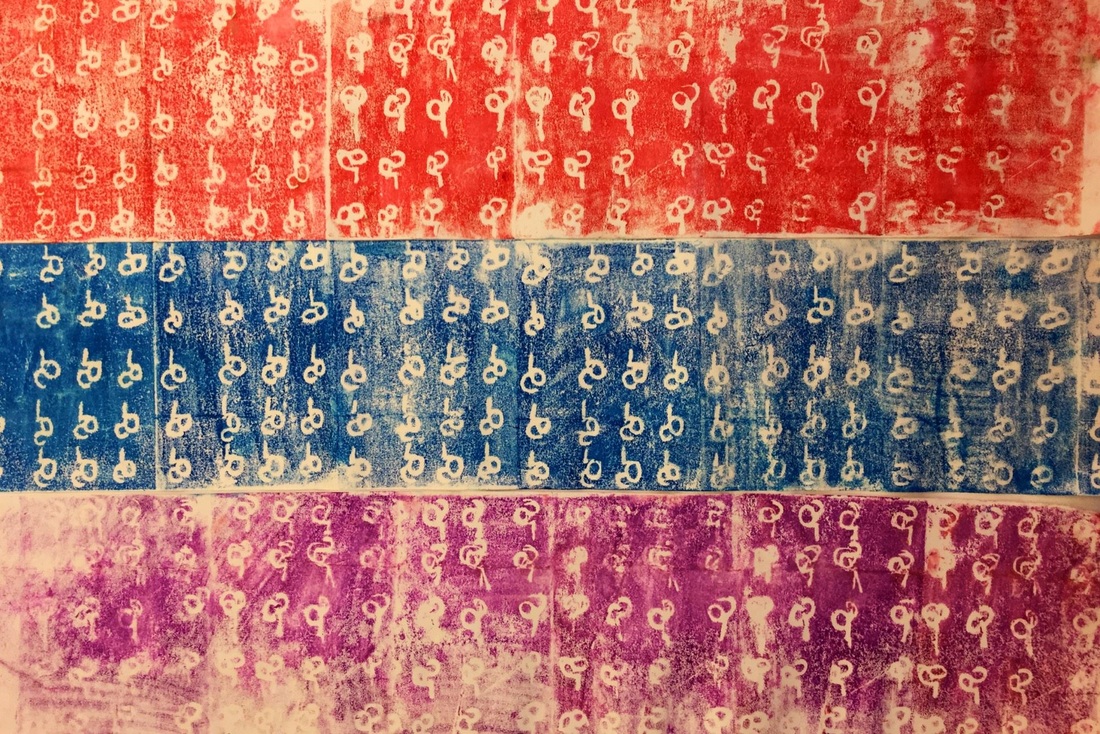
 We just finished up learning about contemporary artist, Judy Ledgerwood. Judy is a Chicago-based artist who is influenced by textiles and the pattern/decoration artists of the 1970s. She repeats a motif over and over with slight variations of the design throughout the painting. While Judy is a painter, we practiced our printmaking skills for the project. We started the project with a worksheet that used our initials to create a design. After creating three initial designs, students chose one and then redrew that design over and over on a small slip of paper. Then they took that slip of paper and taped it to a piece of styrofoam and retraced all of their initial designs with a pen. By doing this, it presses parts of the foam in and creates a relief print. The second day was spent finishing up their designs and styrofoam. Then we talked about relief printing and I showed them a quick video of what a relief printer does. I then showed them how we would use our styrofoam as a relief print. Students colored their styrofoam with a washable marker. I then went around and sprayed their strip of water with a spray bottle. They wiped off the extra water with a sponge so that their paper was damp and then printed their styrofoam onto the damp paper. Lastly, they gently rolled over their styrofoam with a brayer to make sure that they smoothed all the edges. Having them use the brayer as a smoother really helped their prints turn out better. Students printed for about two and a half days. They were expected to print the same color all the way across their strip of paper, over and over. When they finished a strip, they could choose another color and do it all over again. They had to finish at least 3 strips of paper but were welcome to print more. The last day was spent choosing their 3 best strips of paper and gluing them down onto a larger sheet of paper so that it made one large artwork. 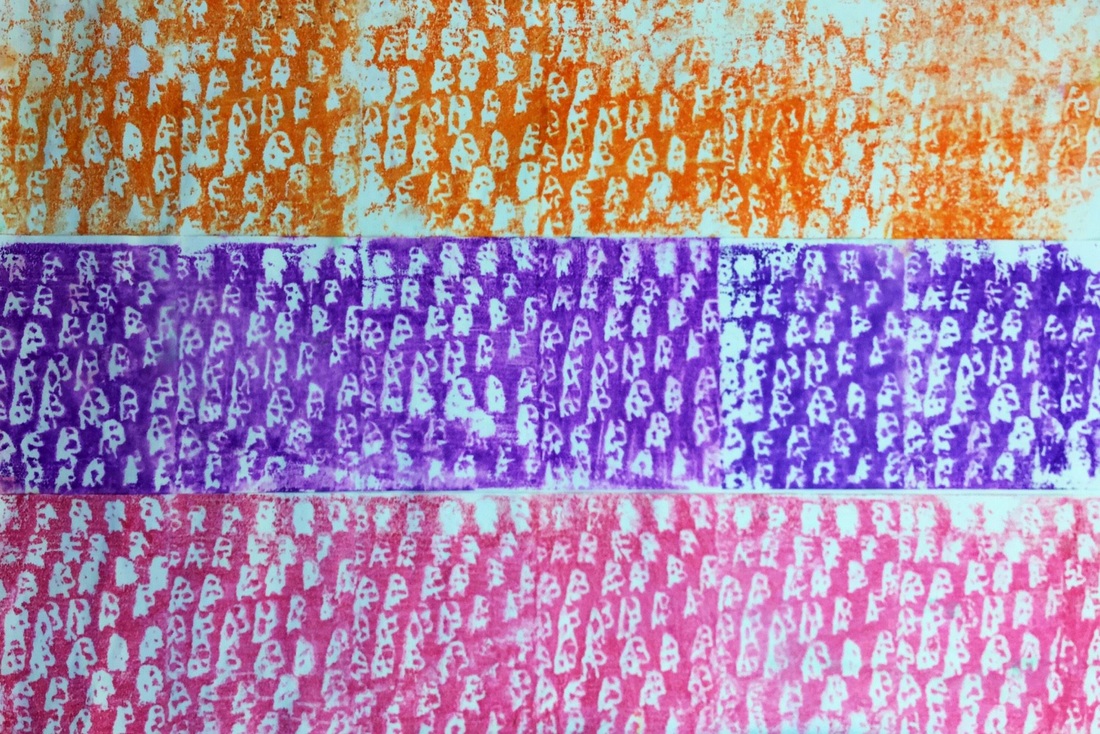
0 Comments
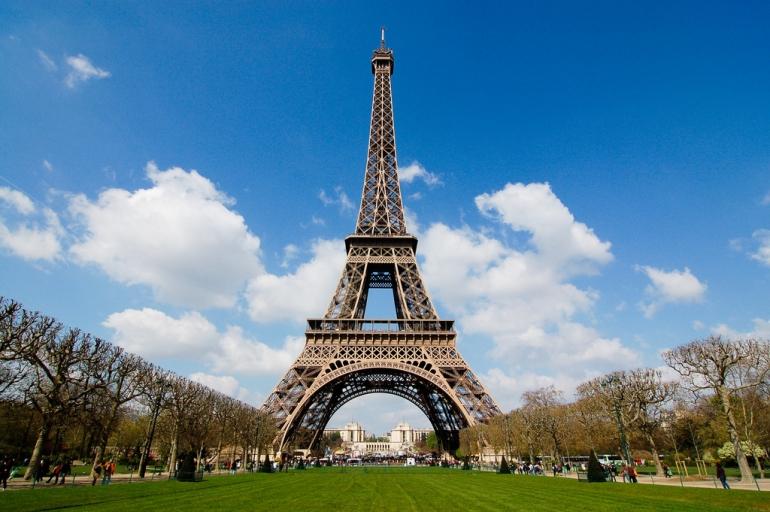
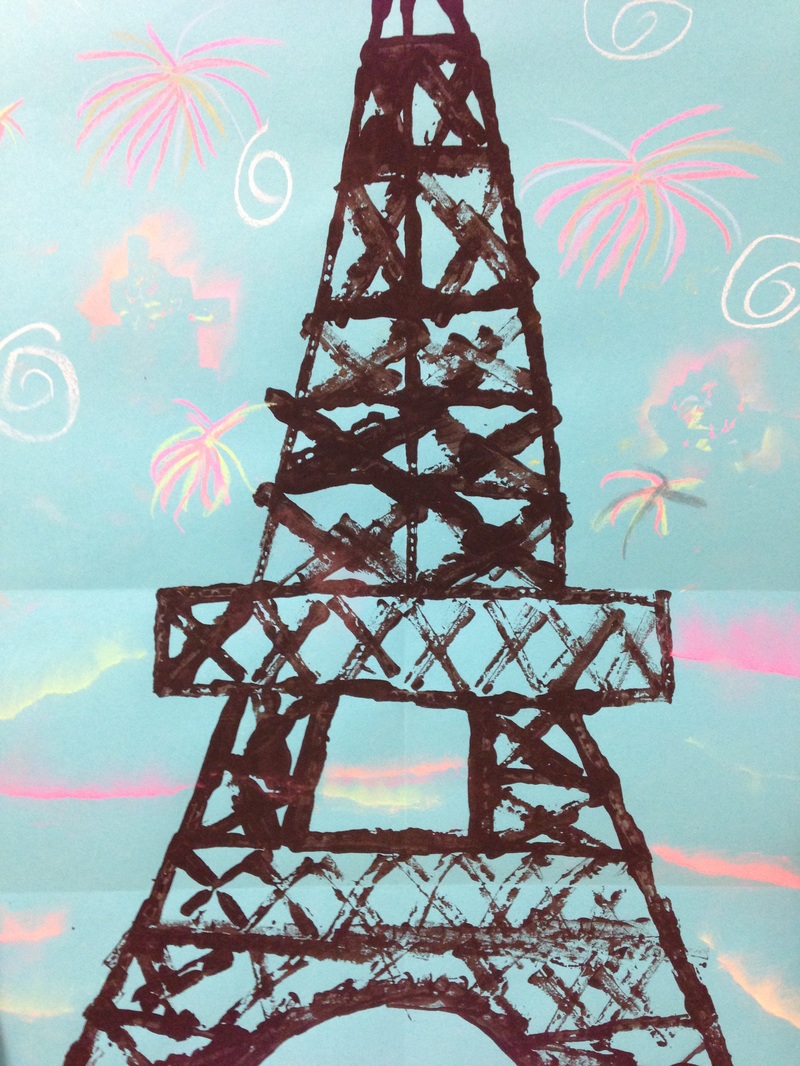
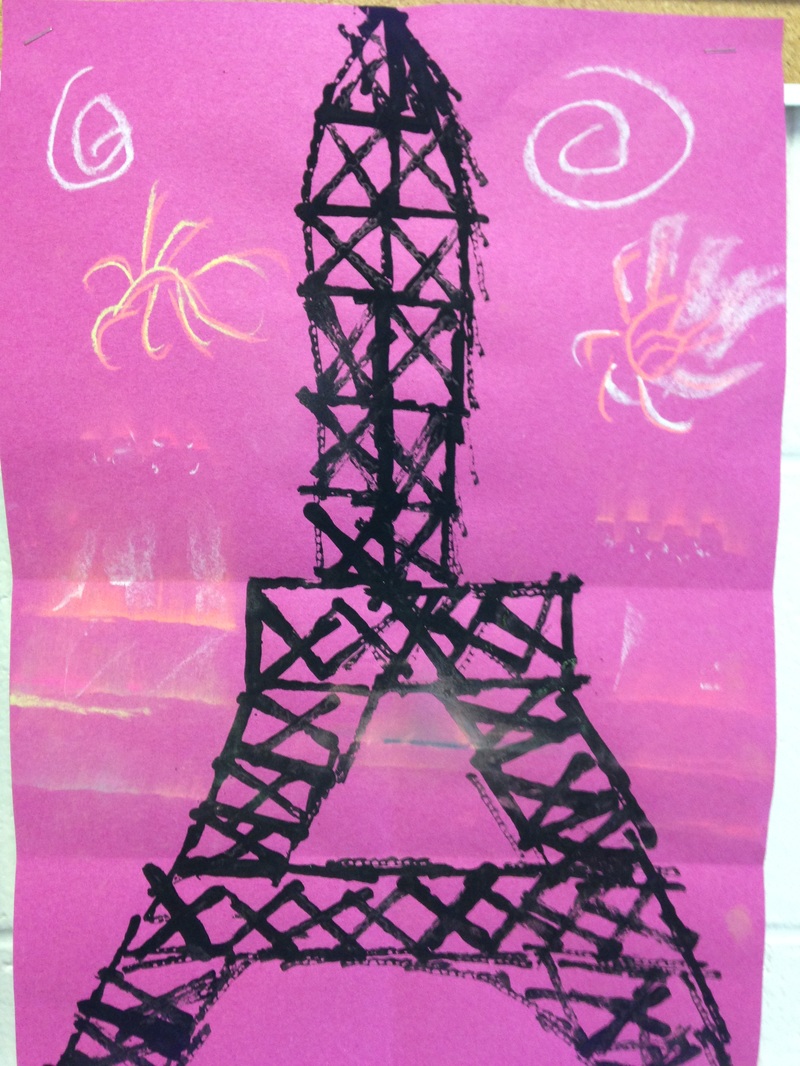
This is a project by Cassie Stephens that I had been thinking about doing for a while. I was torn between doing it and doing something seasonal now that the winter months are upon us. But while I was making this decision, the attacks in Paris occurred and I decided that a project on Paris would be a good way to honor France. When we think of Paris, we think of the Iron Lady. However, many people don't know very much about its creator, Gustave Eiffel. Mr. Eiffel was commissioned to create the Eiffel Tower for the World's Fair in 1889. It was originally meant to be deconstructed shortly after the Fair ended but they decided to keep it around due to its architectural progressiveness. It stood as the tallest building in the world for forty years. It has played a significant role throughout history. Charles Lindbergh used the lit tower to find Paris at the end of his flight from America to Paris. In World War I, it was used as a radio tower and it also intercepted enemy messages. And in World War II, the Nazi's hoisted their flag from it which blew away a couple hours later. The French then climbed back to the top of it and once again hoisted the French flag. Gustave is also responsible for creating the skeletal structure to the Statue of Liberty. We started the project by choosing a background color and folding it in half both ways. Then we folded it a third time by folding the bottom up to the center line. These folded lines would be used as guide lines to print their towers. To make the towers, I cut up small squares of cardboard. Students dipped the cardboard into black paint and printed the outline of the Eiffel Tower (after I had demo'd how to do it). Then they added horizontal lines and “X's” which created the metal lattice of the tower. The second day of the project, we tore a paper a couple times. Then we colored along the torn edge using chalk. Holding the torn paper with chalk against their background, they rubbed their finger upward from the torn paper to off of their page. This left a chalked outline of the torn edge that resembled a landscape. Next, students cut a cityscape into a paper and repeated the chalking process. The students now had chalked land and cities on their background. We dotted some yellow chalk on the cityscape parts to make it look like lit windows. The last part of the day was spent creating fireworks out of chalk. Students also added some spirals to make it look like blowing wind. |
Devon CalvertHarmony and Consolidated Elementary Art Teacher in Milton, WI. UW-Eau Claire graduate. WAEA President. Apple Teacher. 
Archives
March 2019
Categories
All
|

 RSS Feed
