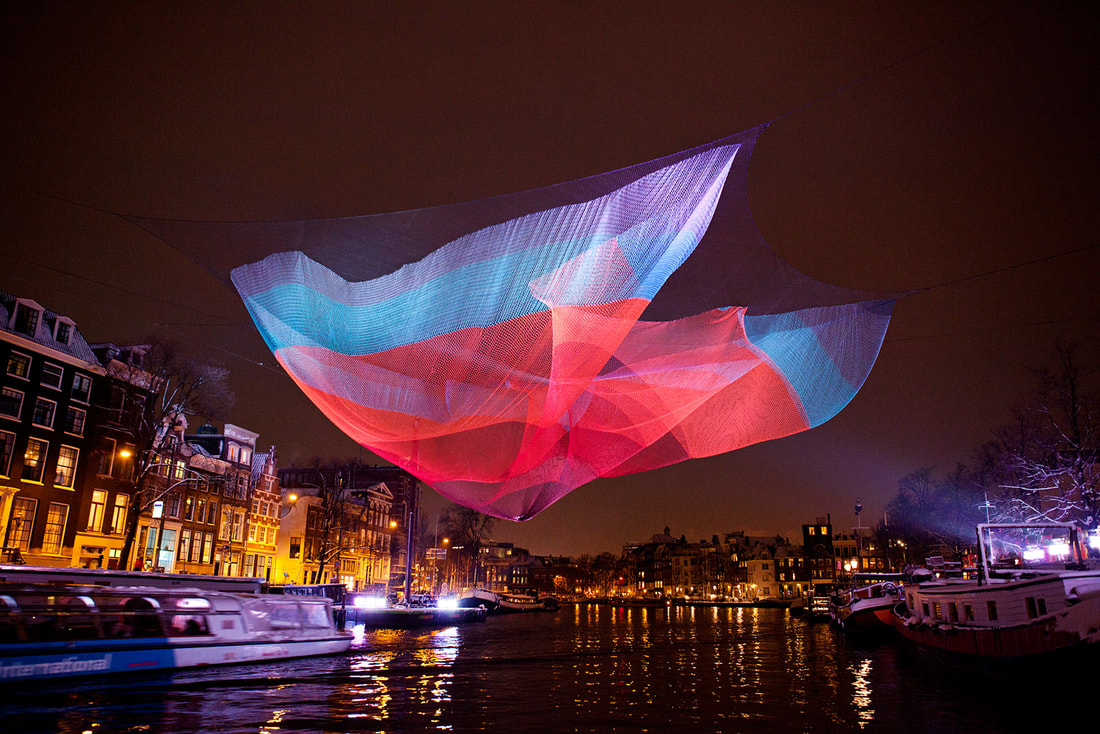
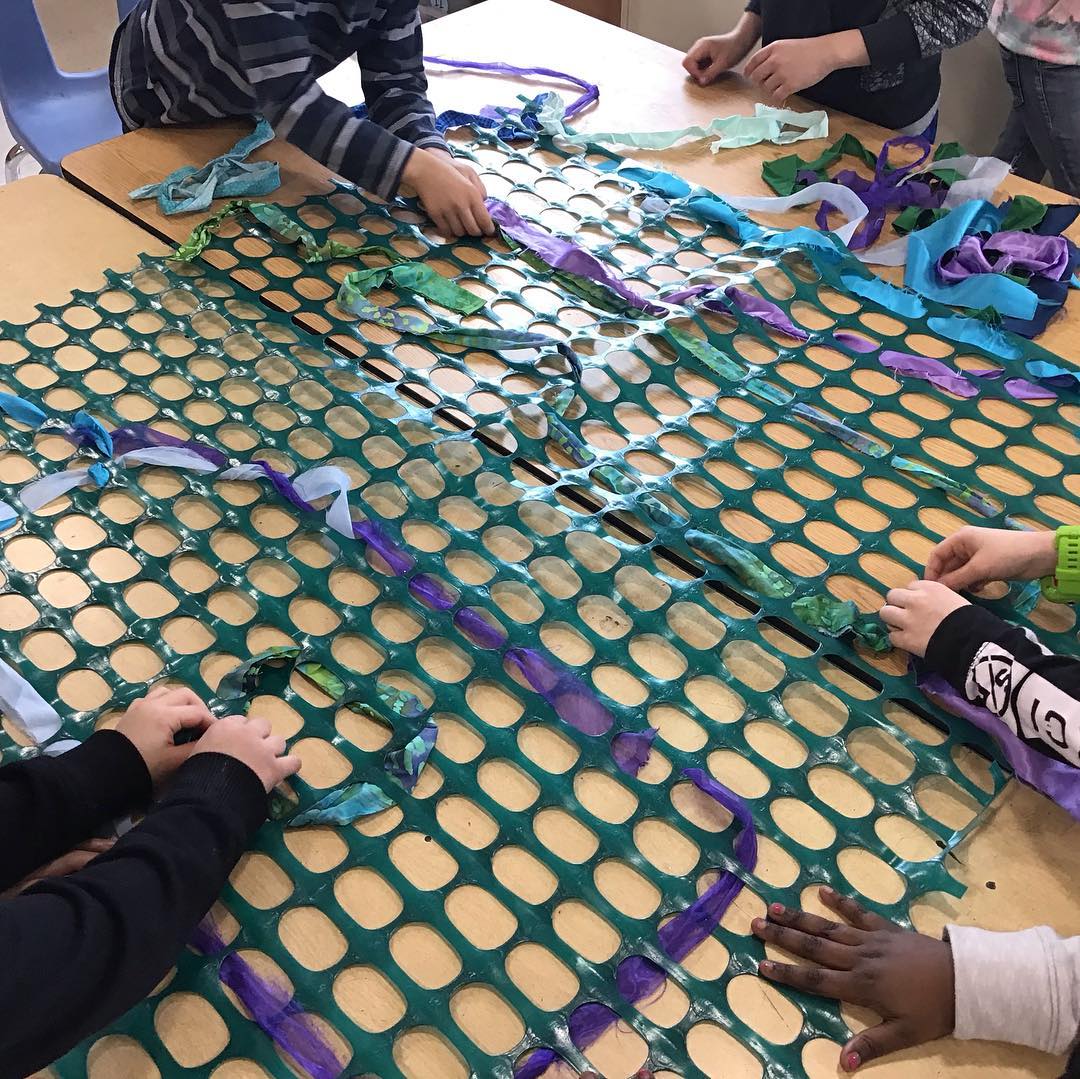
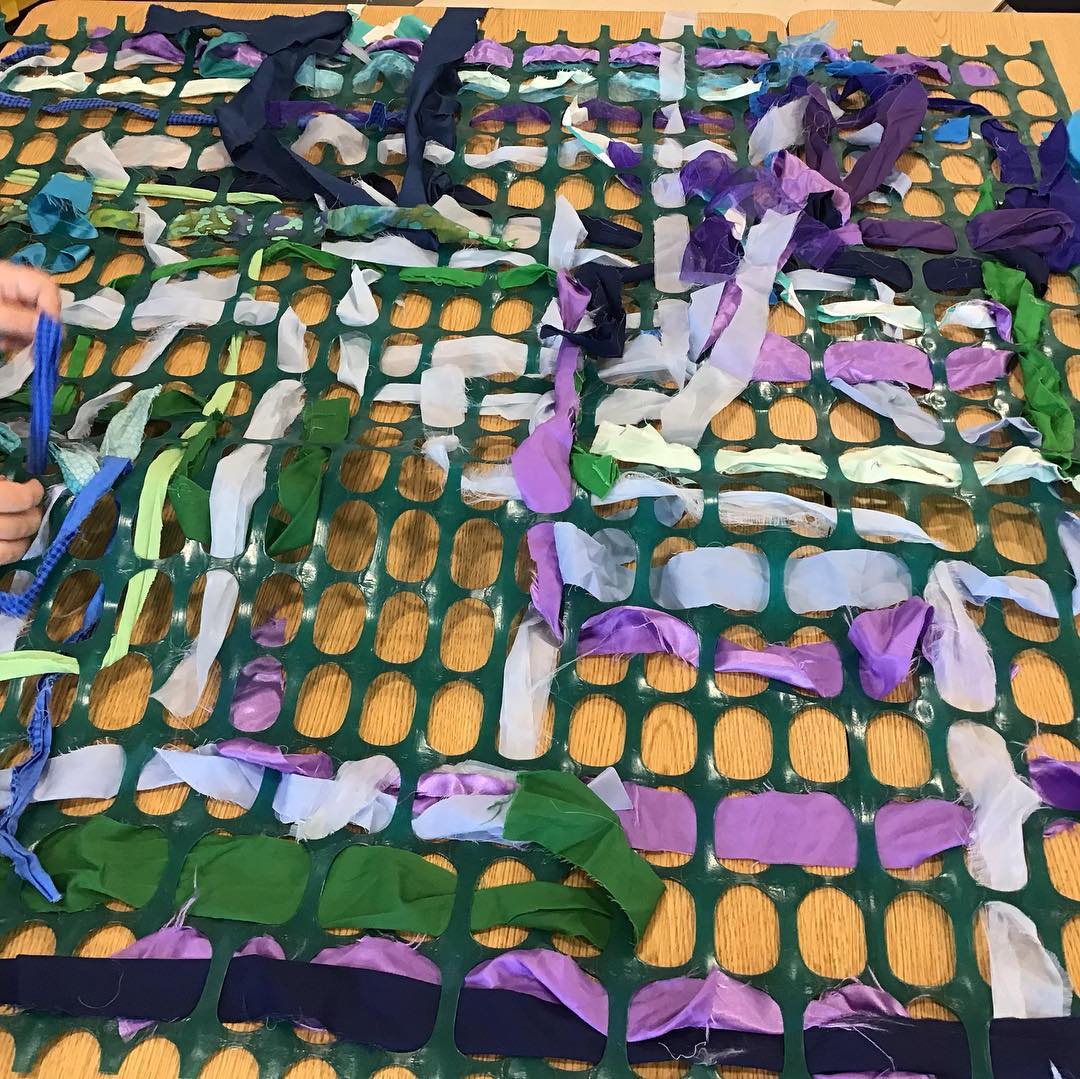
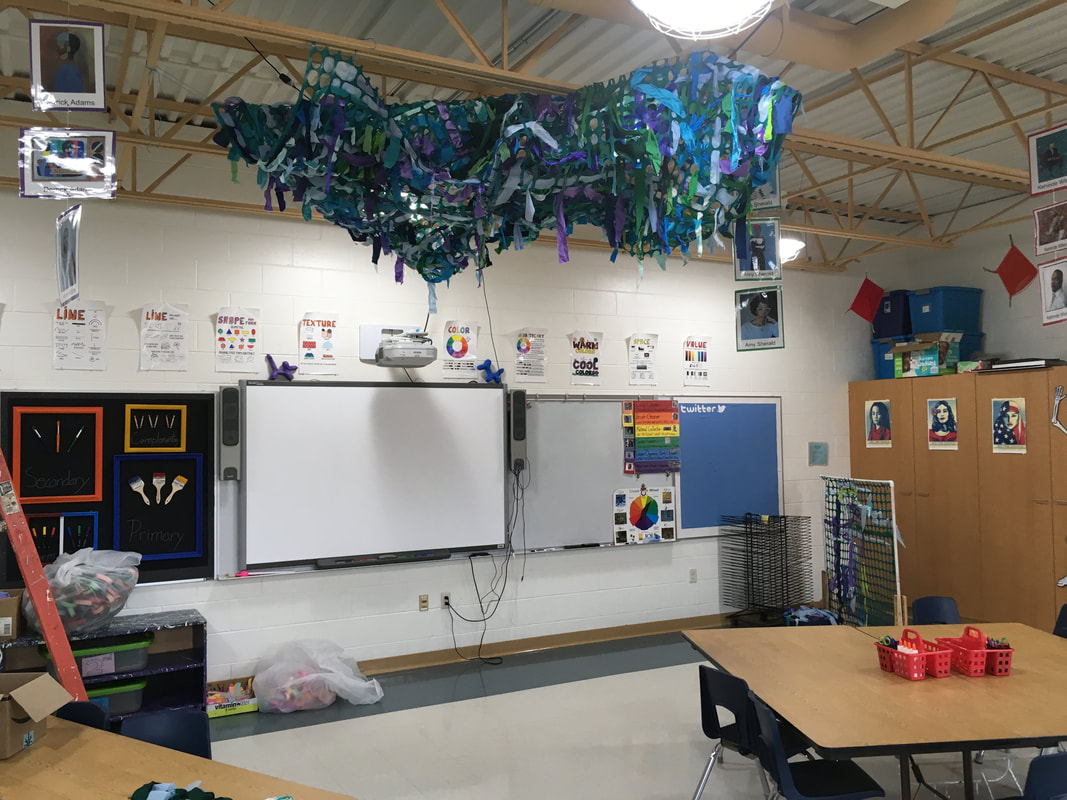
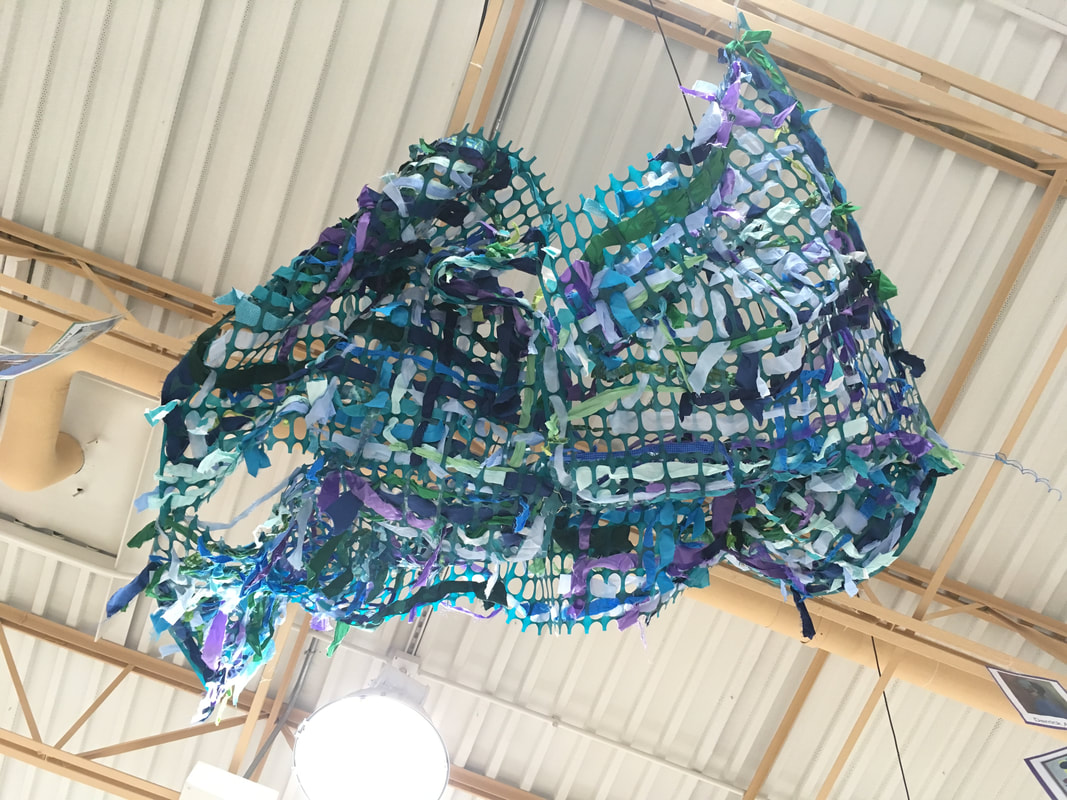
 A few years back, I was lucky enough to receive a $300 grant from the Wisconsin Art Education Association/Handweavers Guild for a fibers project. I chose to do a snow-fence weaving with some fabric. I was intrigued by Janet Echelman's work. She is an American artist who was rejected from seven different art schools but never gave up. She painted for ten years before winning a grant to go to India to make art. After arriving in India, her paints never showed up in the mail so she was forced to adapt to something new to make artwork for several shows that she had coming up. While there, she made a large installation out of the local fisherman's nets. She then began to create large and larger works of art. One thing that I lve about her is that she is the definition of STEAM. The amount of math, science, technology, engineering, collaboration, and art that goes into her work is phenomenal. They now are oftentimes placed in parts of cities that are less than desirable. Because of her sculptures' popularity, the crowds that come to see them oftentimes force out unwanted activities while bringing attention to areas of cities that need it. The sculptures are really interesting because they are made out of a light netting that catches the breeze. So when the wind blows, it's almost as if you can see the wind as it ripples through the netting. Janet describes her works as "sculptures of wind." I can't tell you how excited I was to finally get to see Janet give a presentation at the NAEA19 convention and then get to meet her afterwards! 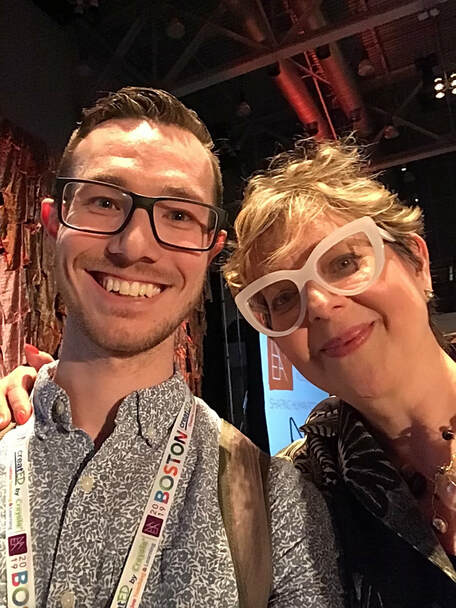 This year, I had my 2nd grade students work collaboratively on some large-scale weavings. I split each class into 4 groups and then they worked together to weave fabric strips into large squares of snow-fencing. I like weaving into snow-fencing because the holes are fairly large and it make sit easier for each student to succeed when weaving.  After each 2nd grade class had a chance to weave into the fencing, I wired the 4 weavings together to make one large weaving. I then strung it up to my ceiling. While tying it up, I was conscious of twisting, turning, and manipulating certain parts of the weaving so it took on an organic form similar to Janet's work. I love watching students lie underneath it and stare up at it! 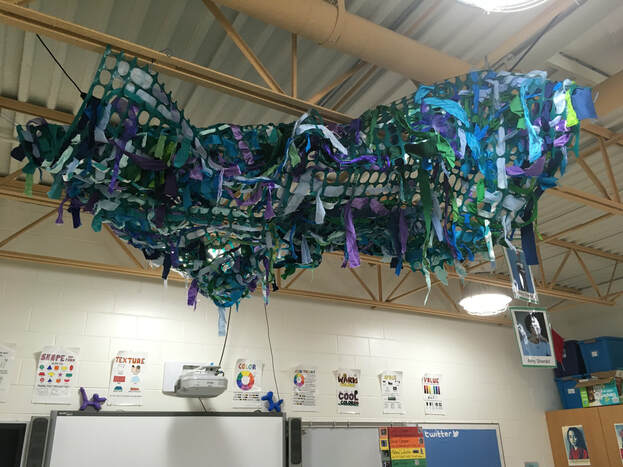 After meeting Janet, I was so impressed by not only her work, but also her personality and demeanor. She was wonderful to talk to and after explaining/showing her my students' project inspired by her, she asked me if she could send my students a video. Of course I said "yes!"
0 Comments
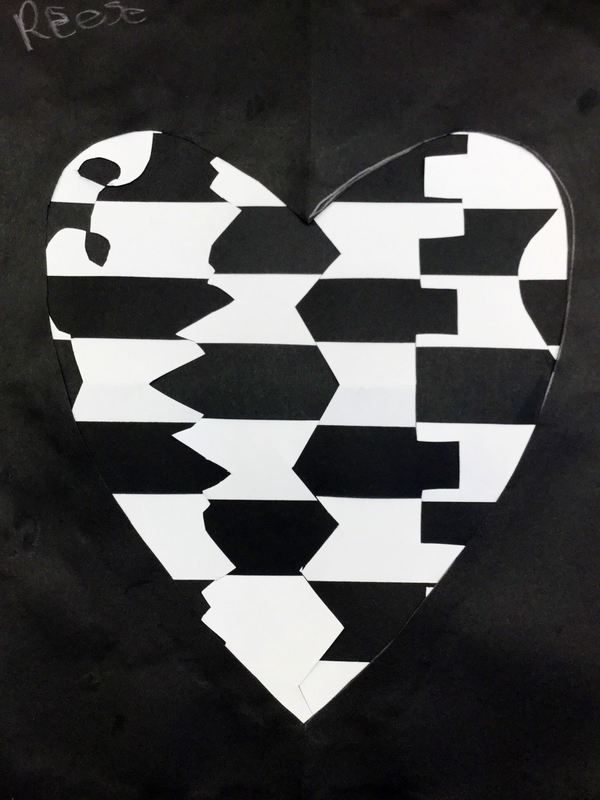
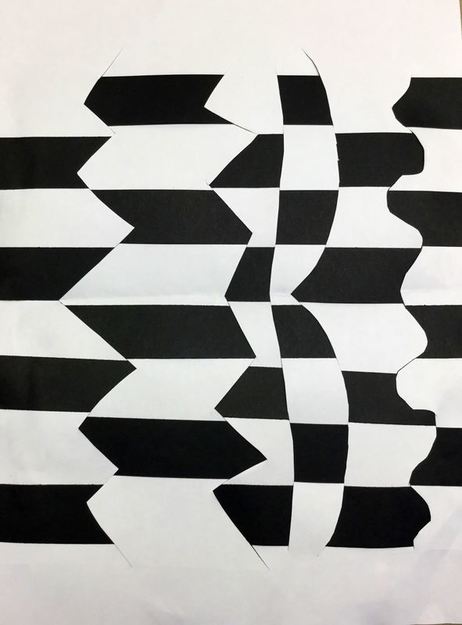
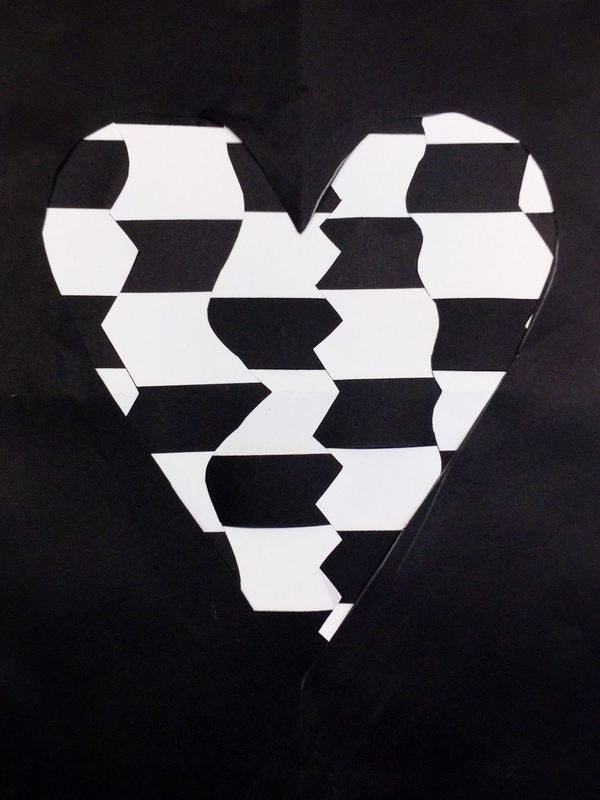
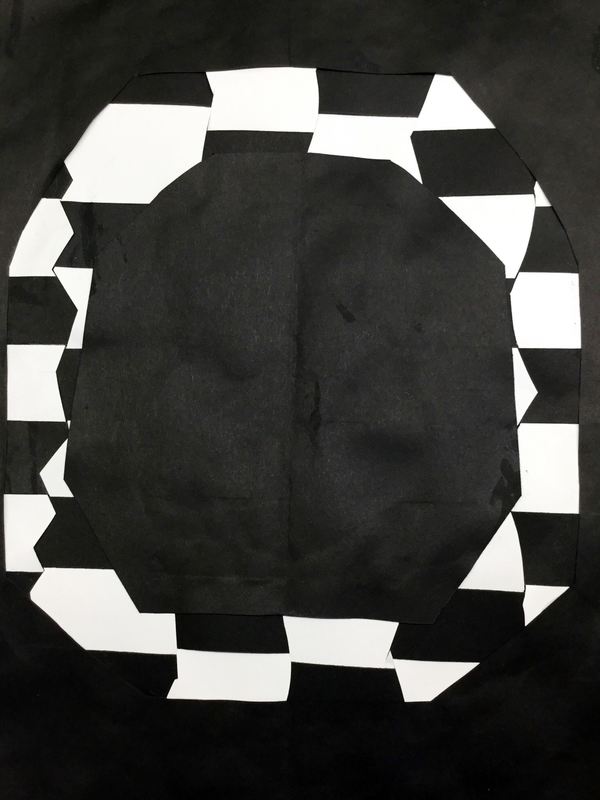
2nd graders recently learned about the Op artist, Bridget Riley. Ms. Riley is an artist from London who specializes in creating optical illusions in her artwork. Her artwork is usually large-scale because it has a more disorientating effect on the viewer when it is larger. The kids thought her artwork was super cool! They were blown away by the fact that even though the painting wasn't moving, it gave the effect that it was. 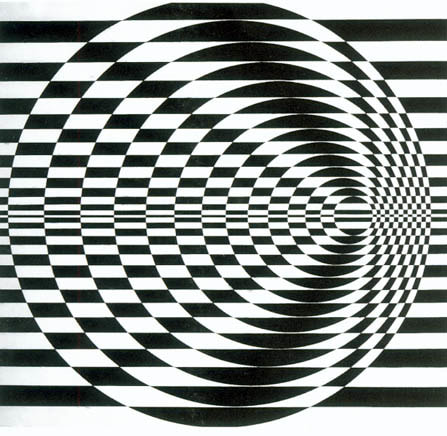 This Bridget Riley project was different than what I have done in the past. This is a project that I got from my friend, Tasha Newton, over at iartmyjob.wixsite.com !This year, I had students create a weaving inspired by her work. On day one, I introduced students to her work. Then, they received a white sheet of paper that had been folded in half. They cut 5 crazy lines into it (curly, angled, etc). Then they began to weaving into these oddly cut shapes. The second day, they finished their weaving. Then they chose a black sheet of paper, folded it in half, and cut a geometric shape from it. They glued the black paper with the shape cut out of it on top of their weaving. One class was a day behind the others so they just created the weaving and didn't glue the black paper on top.
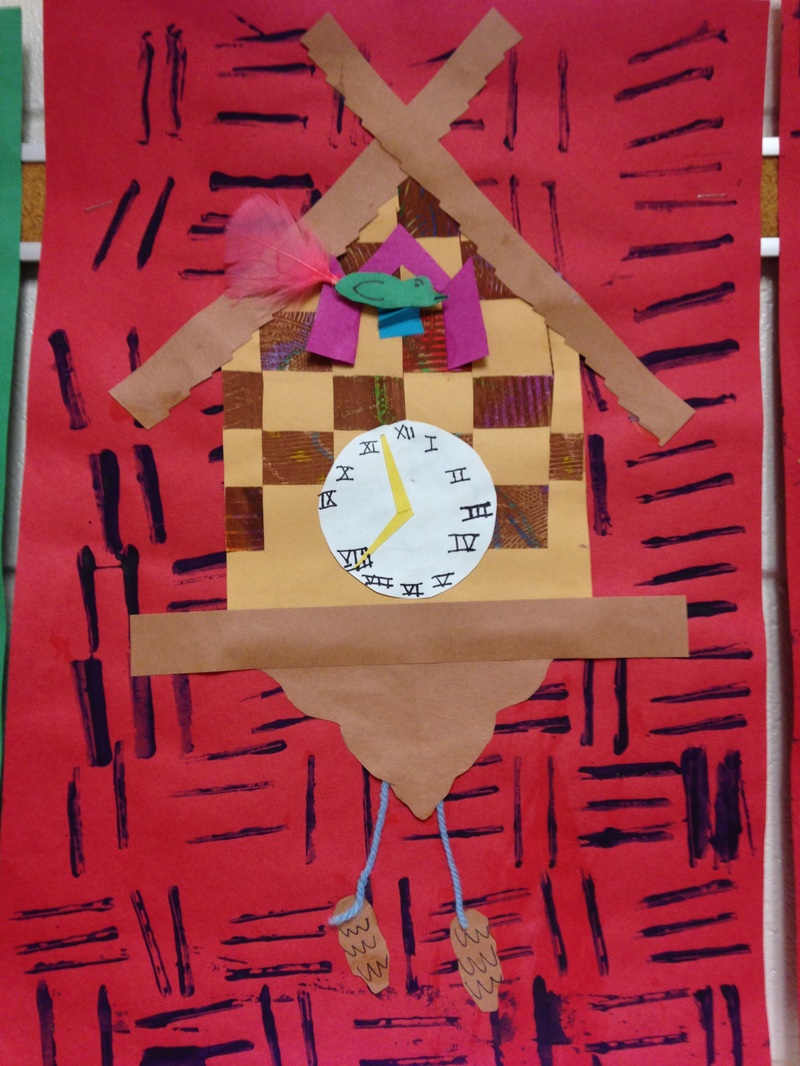
We finished this project a LONNNNNG time ago and I didn't realize that I had never posted it. It's a lesson that I got from the fabulous Cassie Stephens. We started off by using oil pastels on a piece of paper and then painting brown over it. Then we used combs to scrape paint off of the paper. After our brown painted paper had dried, I cut it into strips and students wove the brown strips into a paper loom. This would later become the housing for the clock. Then we trimmed the tops of the clocks so that they came to a point. For the third class, we used a piece of cardboard to print a pattern onto a sheet of paper for the background. We also used fancy scissors to create the trim to our clock. For the final class, we added the clock and I taught the students how to write Roman Numerals. We also added yarn and the pinecone weights to the bottom of the clock. Last but not least, we added our cuckoo bird! |
Devon CalvertHarmony and Consolidated Elementary Art Teacher in Milton, WI. UW-Eau Claire graduate. WAEA President. Apple Teacher. 
Archives
March 2019
Categories
All
|


 RSS Feed
