|
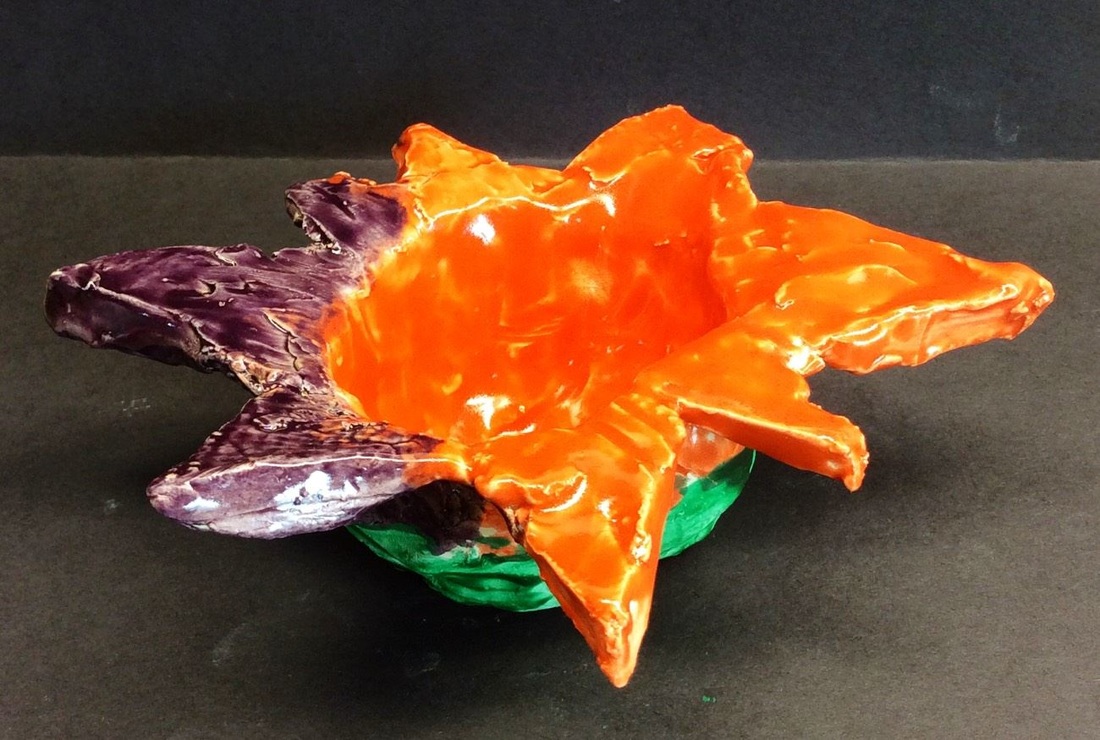
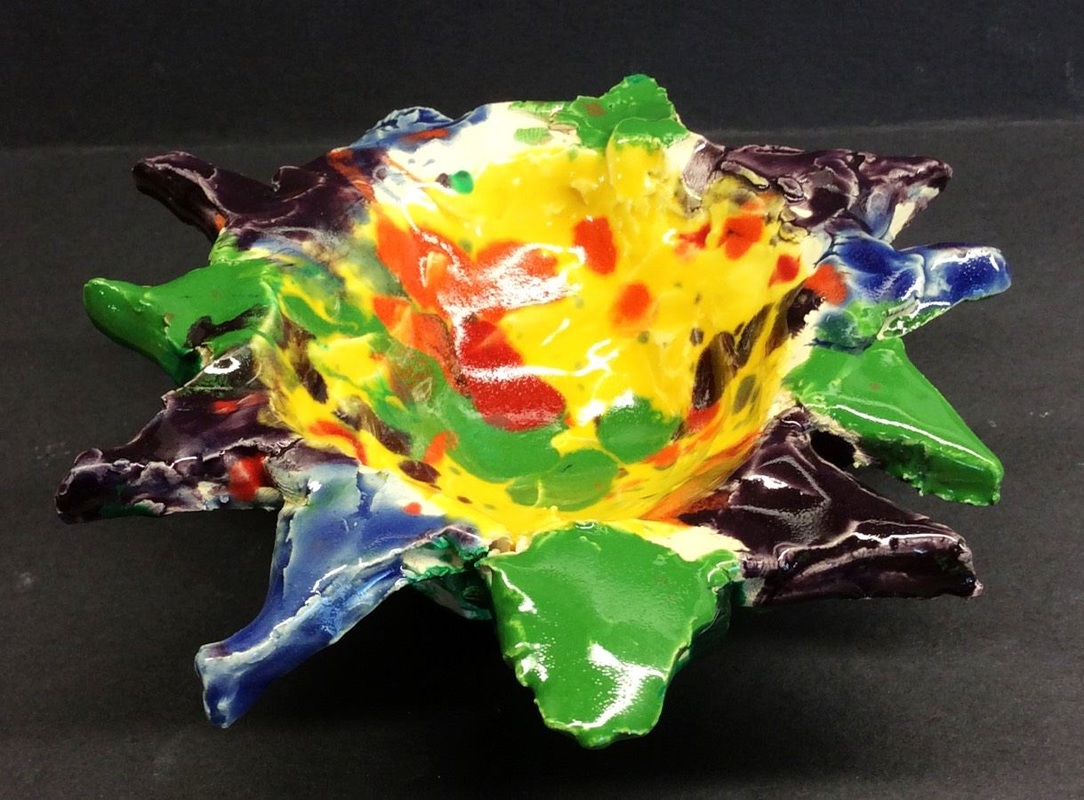
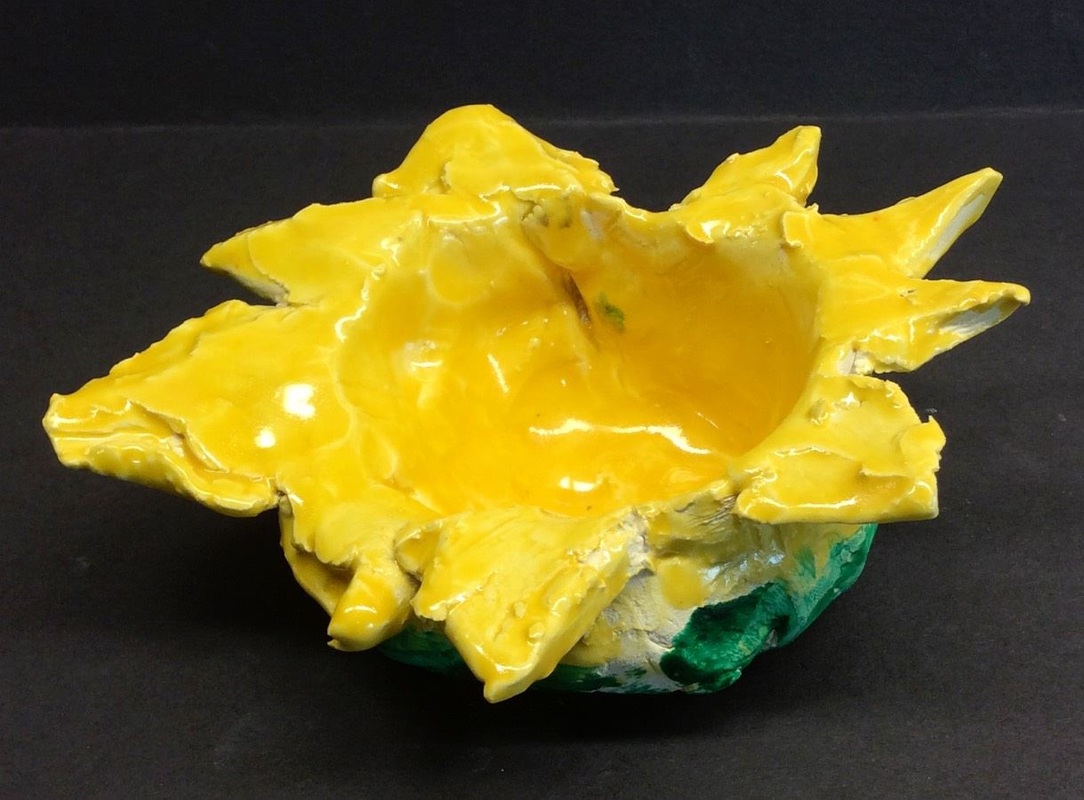
1st Grade had the chance to learn about the super famous Vincent Van Gogh! We used his love for sunflowers as an inspiration for our pinch pots! 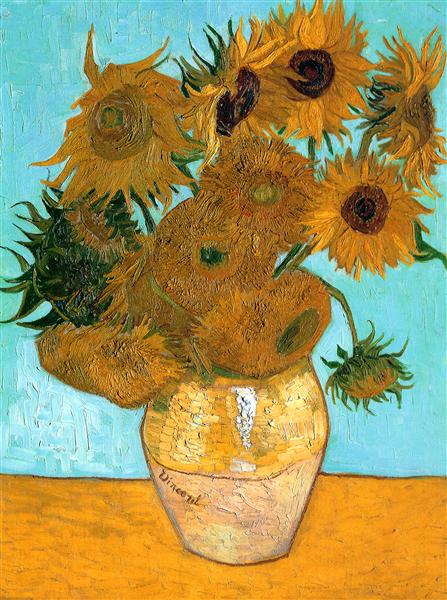 I remembered seeing a pinch pot sunflower project floating around Pinterest somewhere and thought that would be a good way to introduce the students to Vincent. We started off by learning about how to create pinch pots, as well as learning about scoring, slipping, and smooth our flower petals to the edge of the pot so that they wouldn't fall off. I made sure to emphasize that if they didn't slip, score, and smooth, they would end up with a sad looking flower. This project proved to be a pretty tough one for them but we managed to crank it out in a single class period. After firing their clay pieces and showing the students the kiln room, we got back our flowers. Students glazed the inside of the flower and the top/bottom of its petals. I asked them NOT to glaze the bottom rounded part of their flower because it would fuse to the kiln shelf. The glazing turned out beautifully! Students finished off their flower by painting the un-glazed bottom part green with tempera paint. 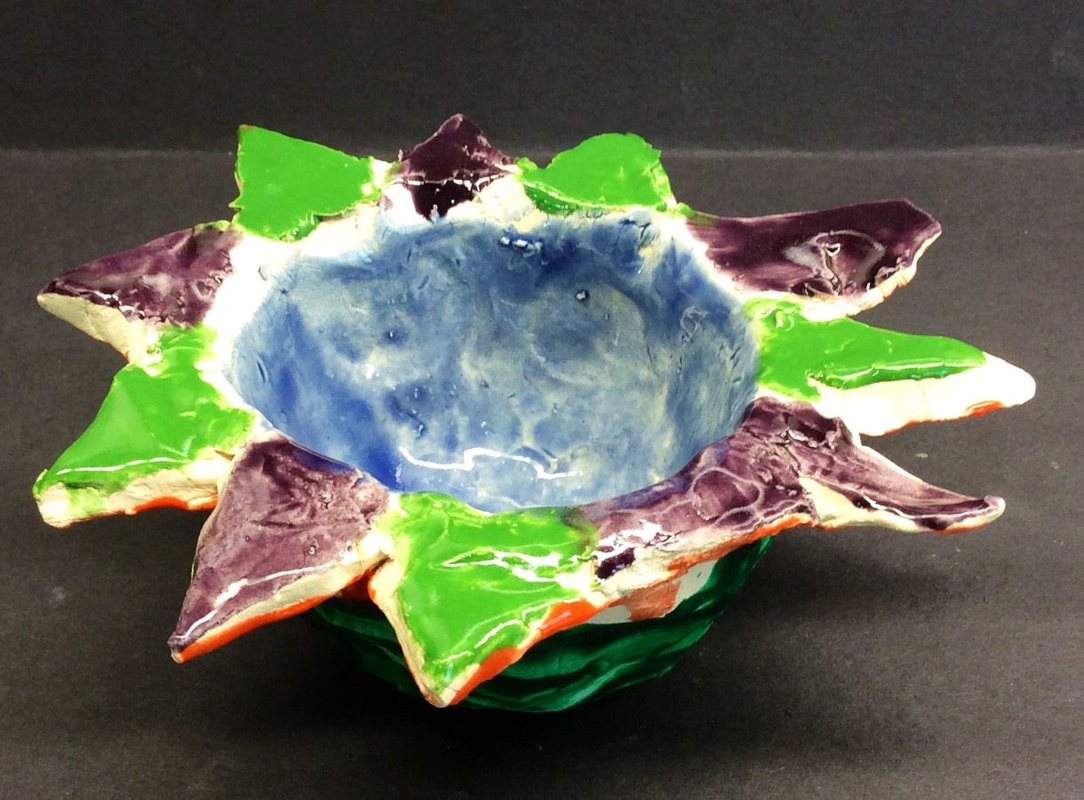
0 Comments
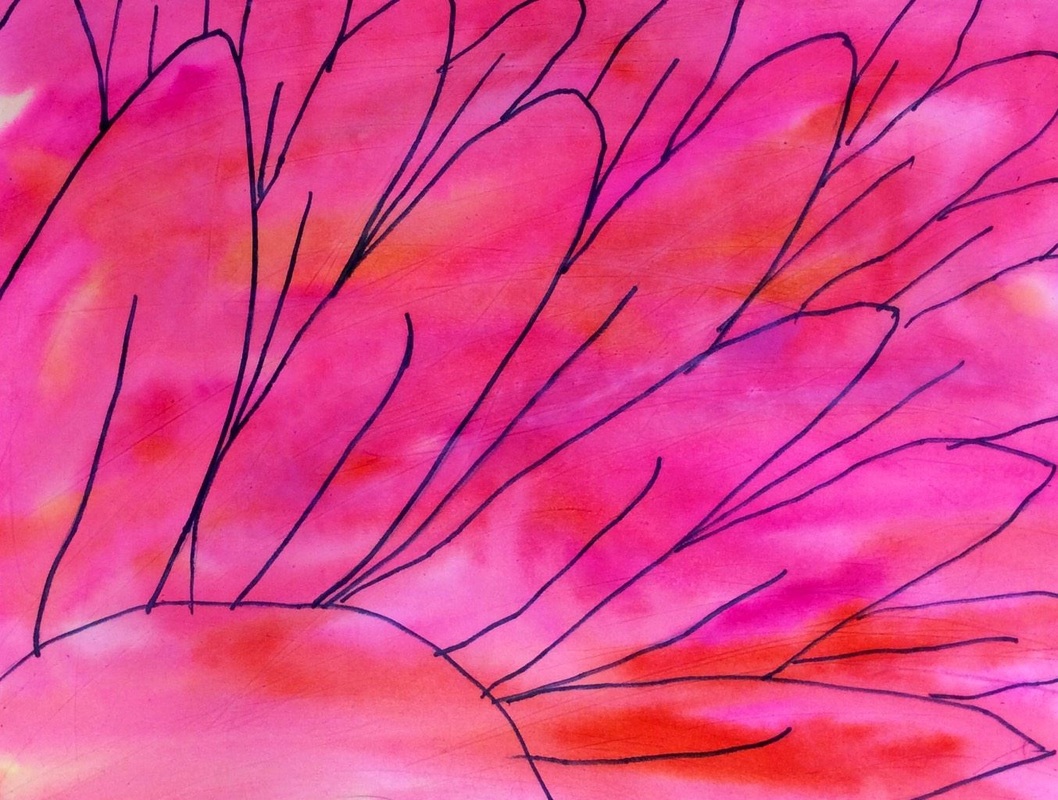
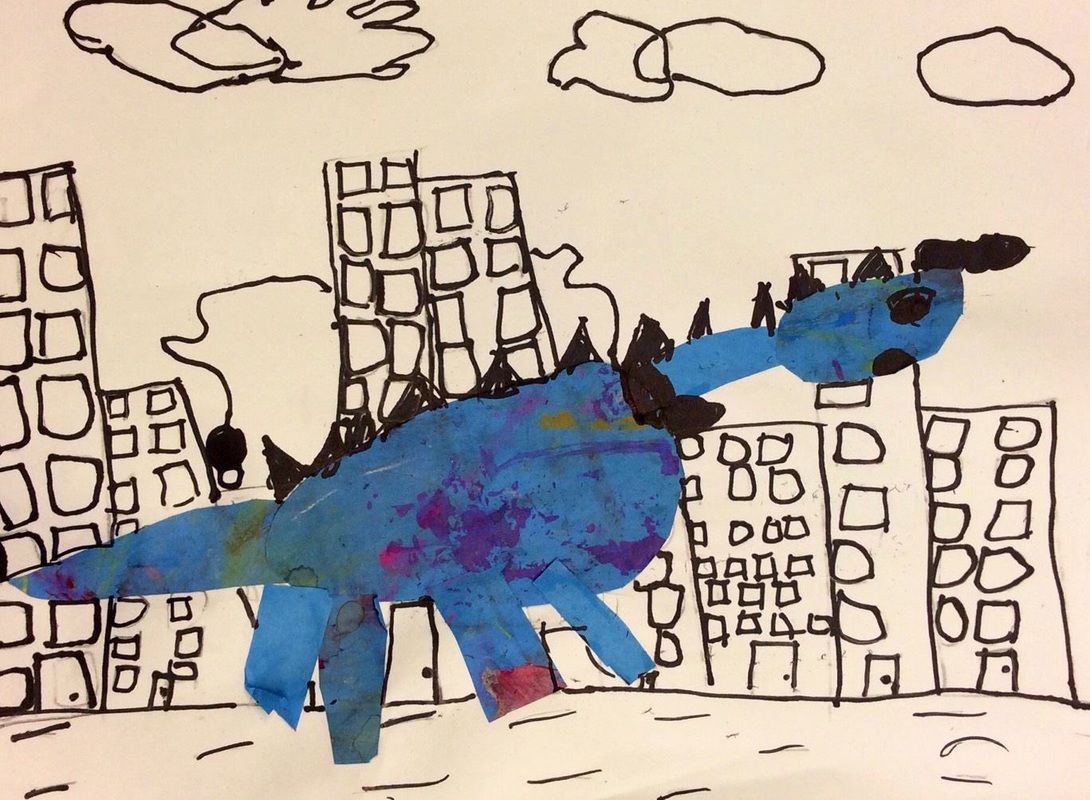
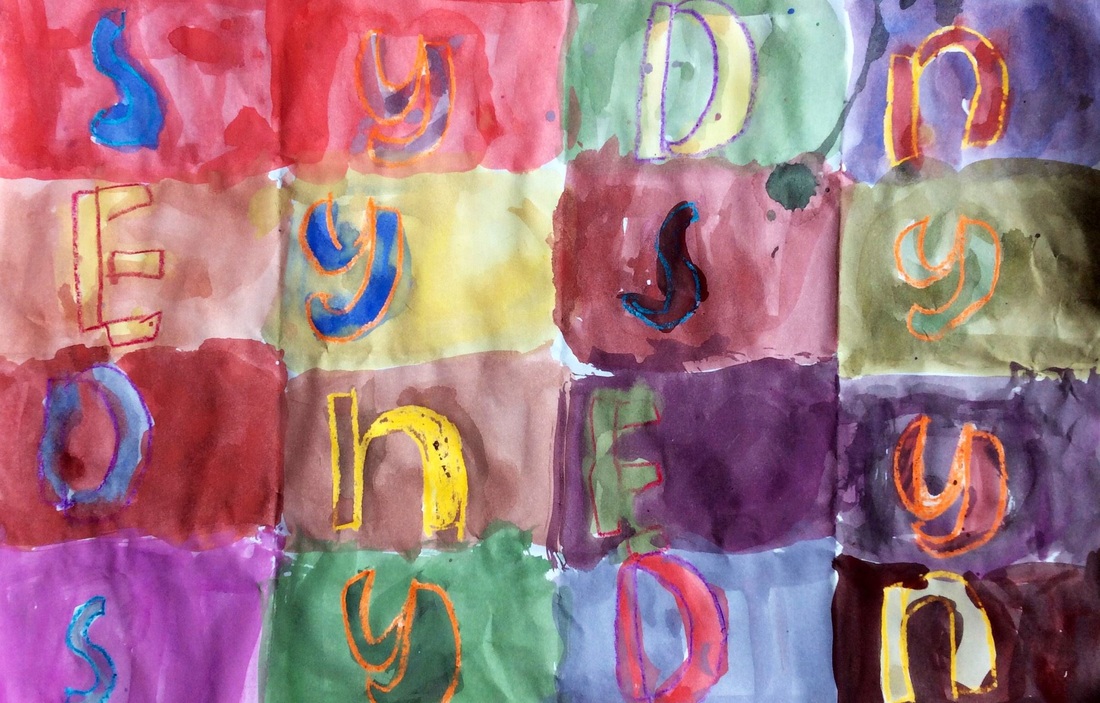
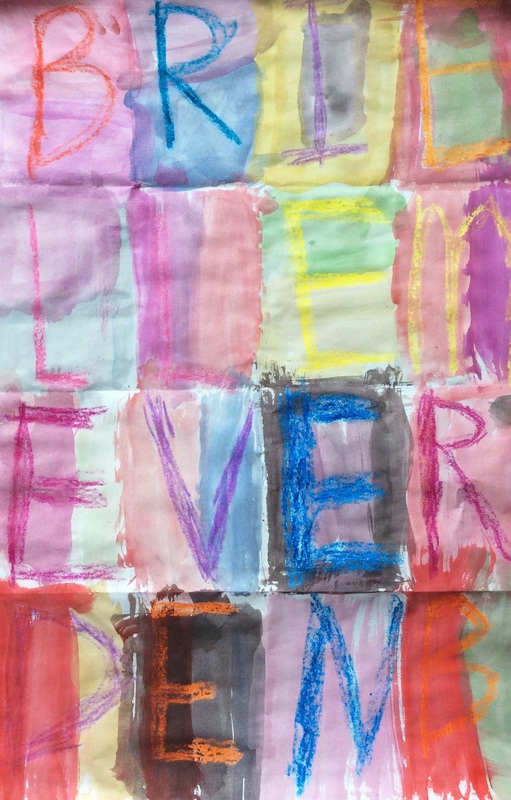
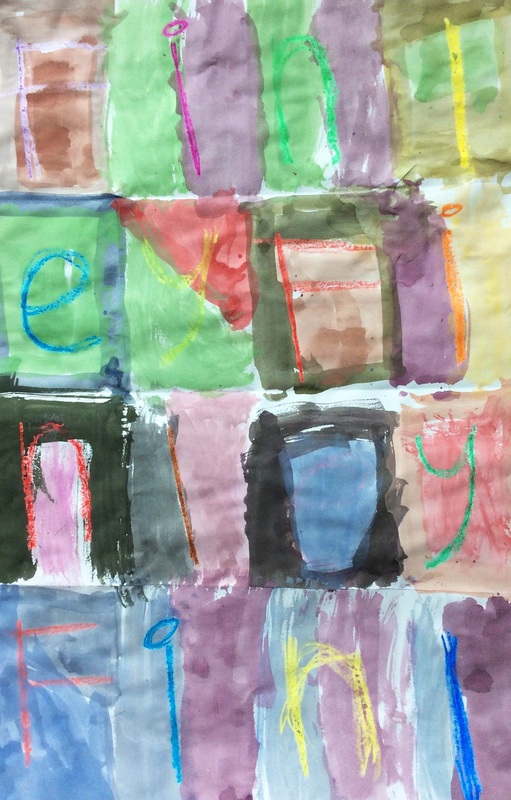
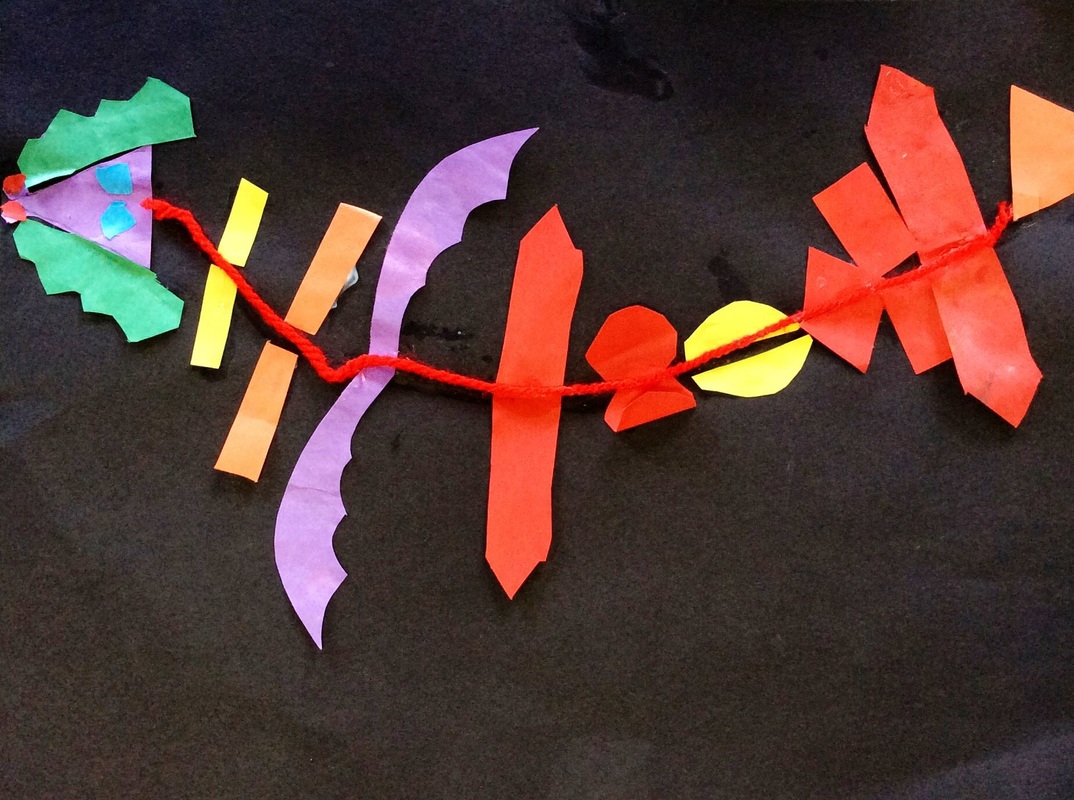
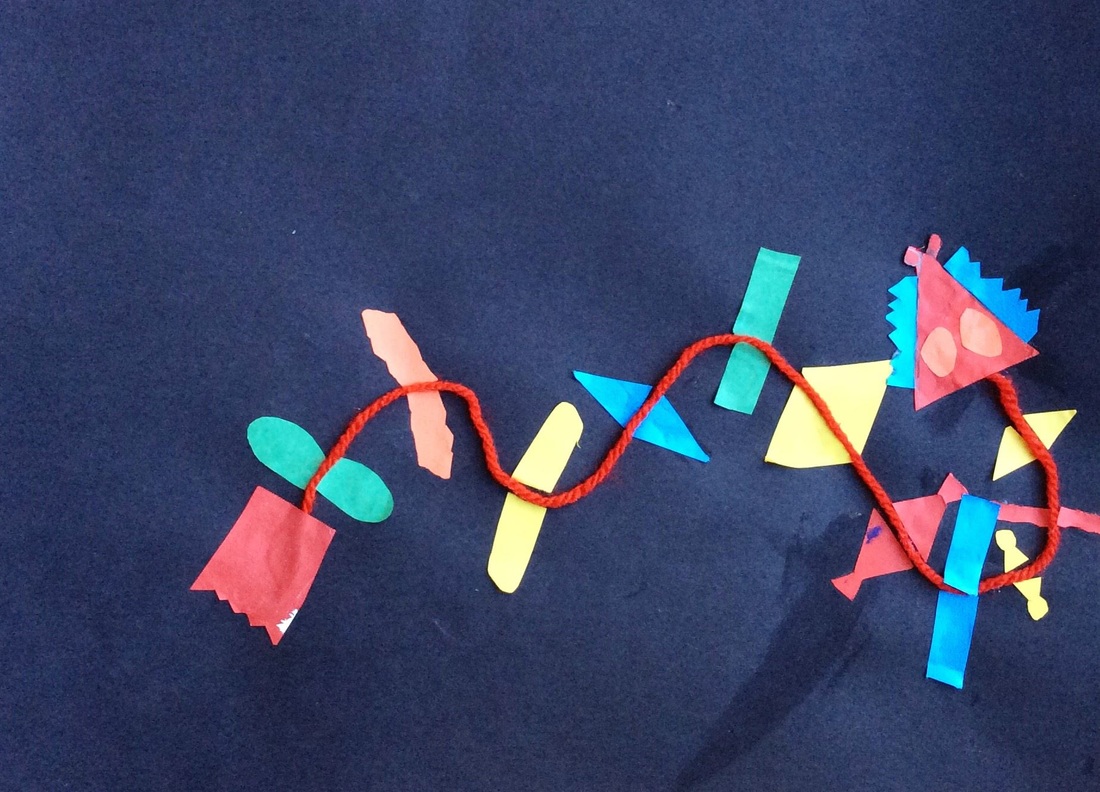
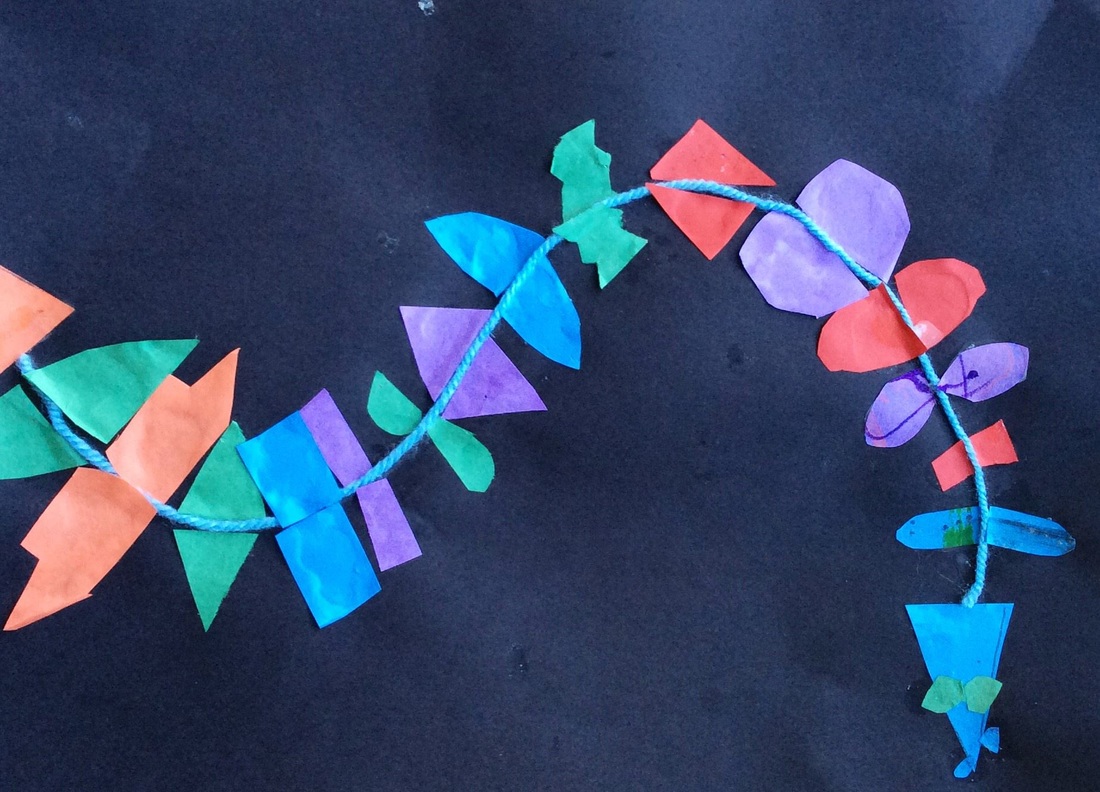
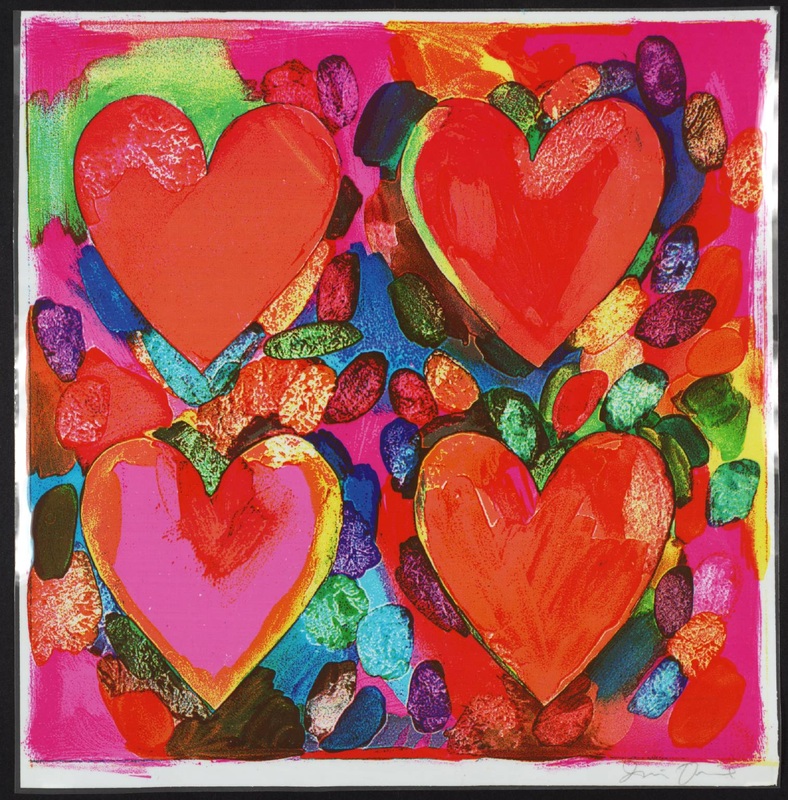
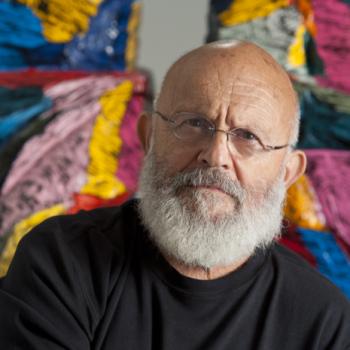
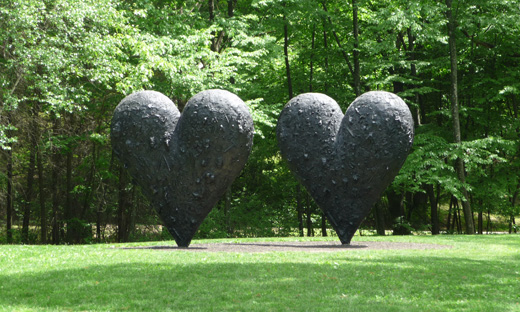
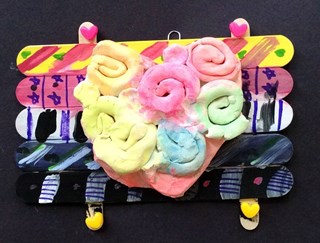
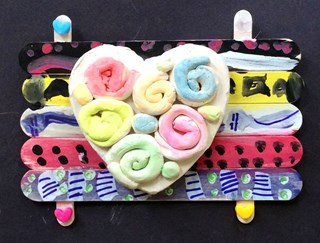
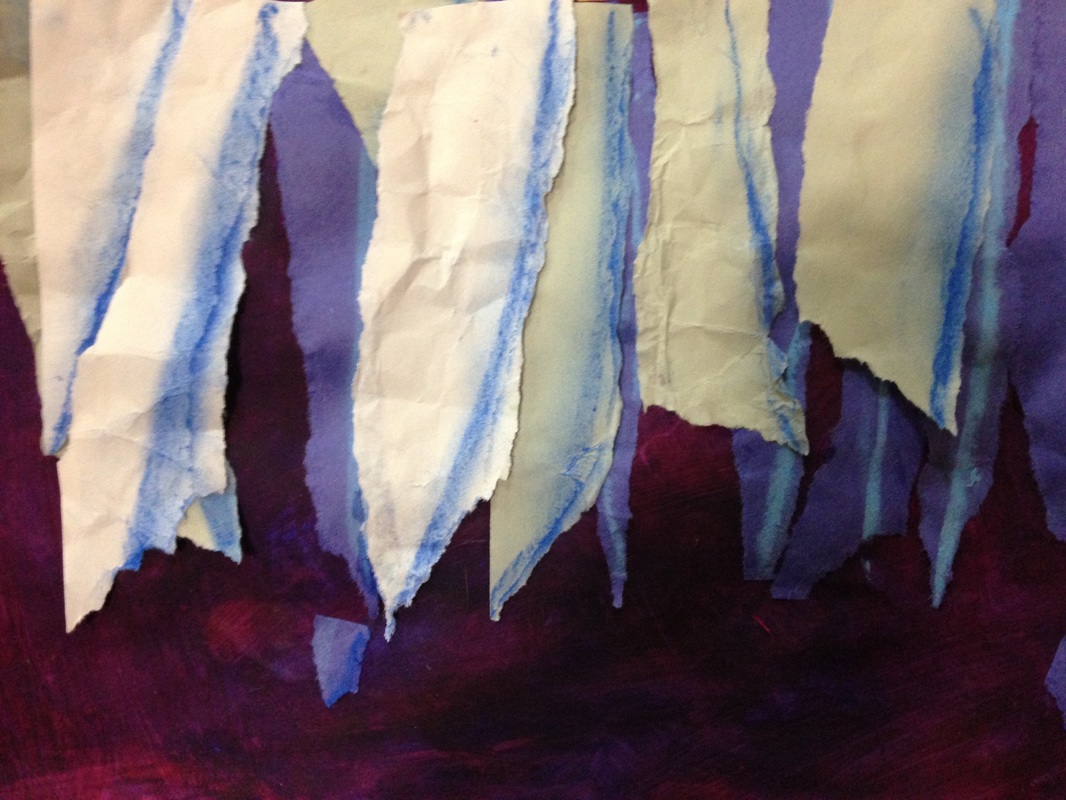
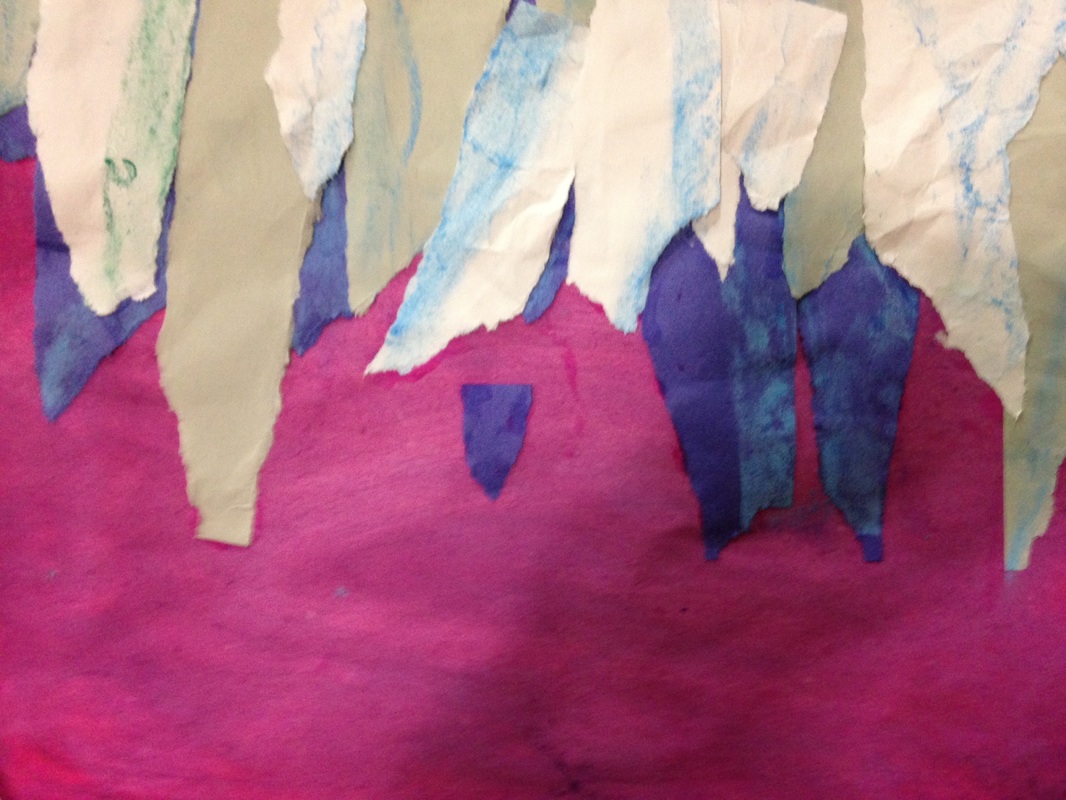
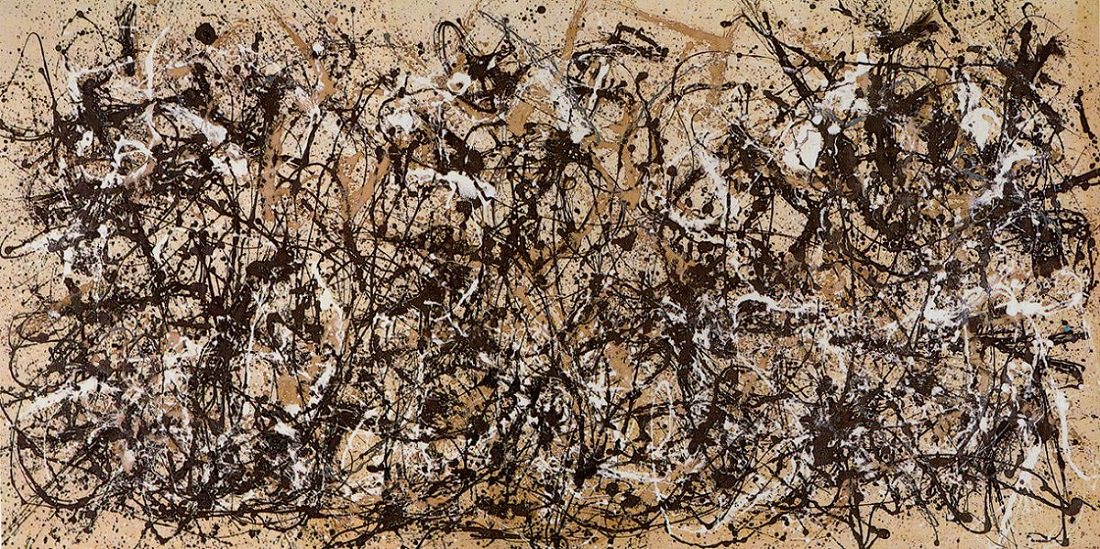
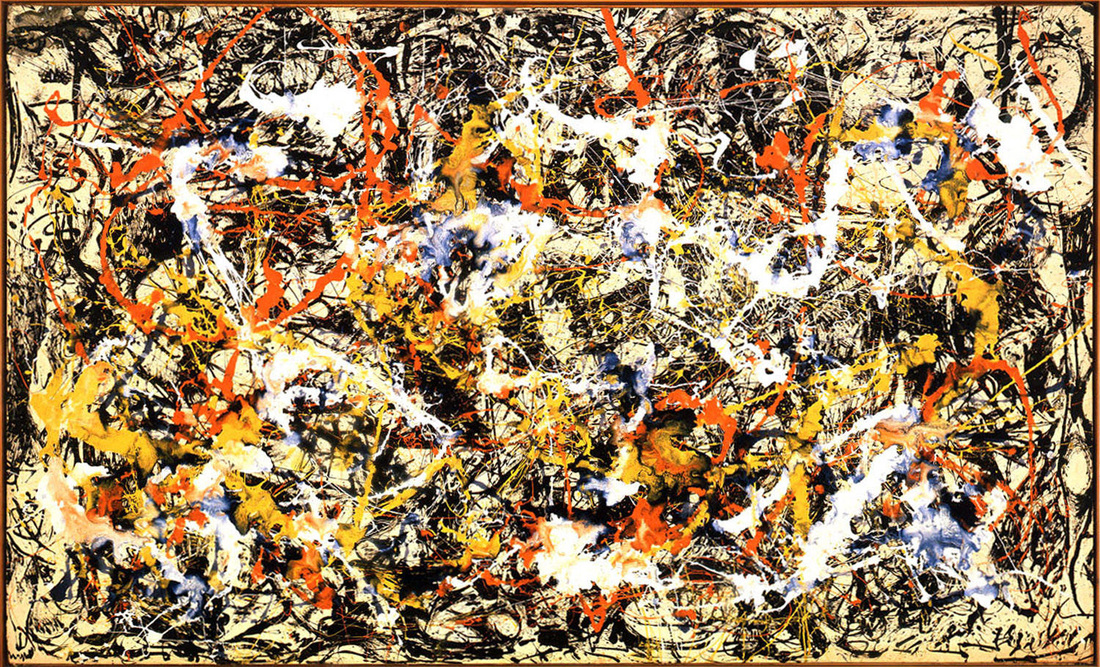
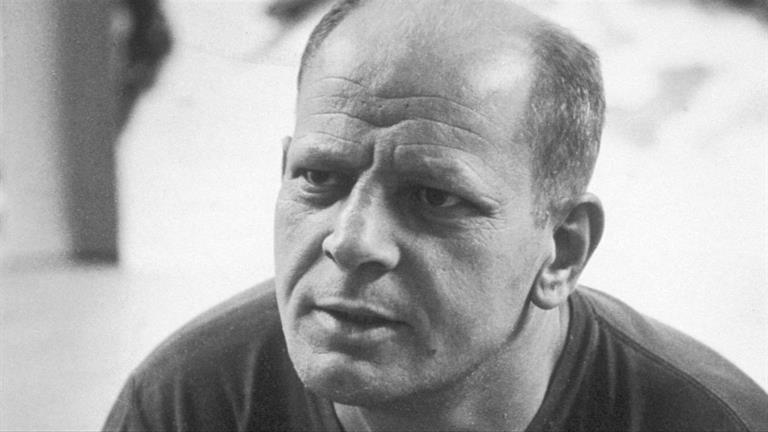
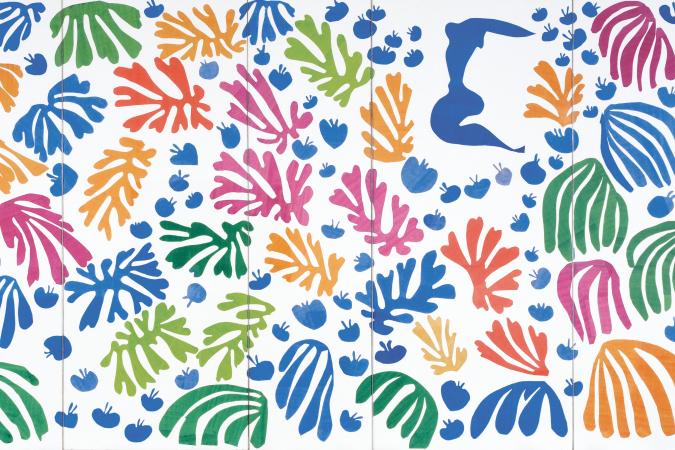
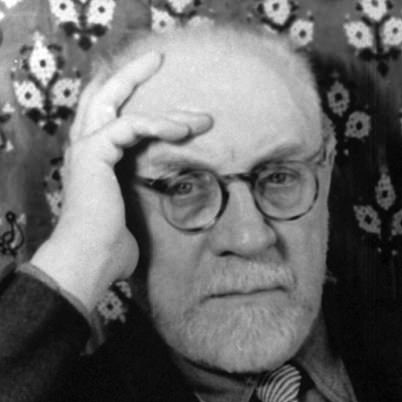
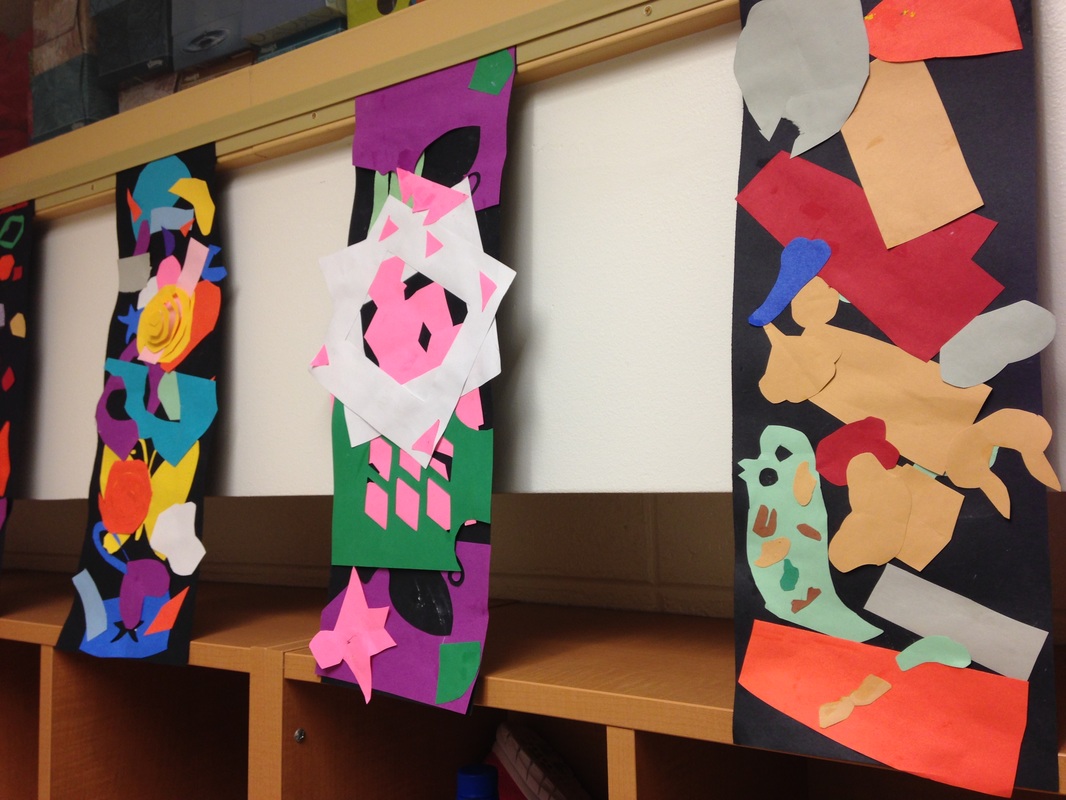
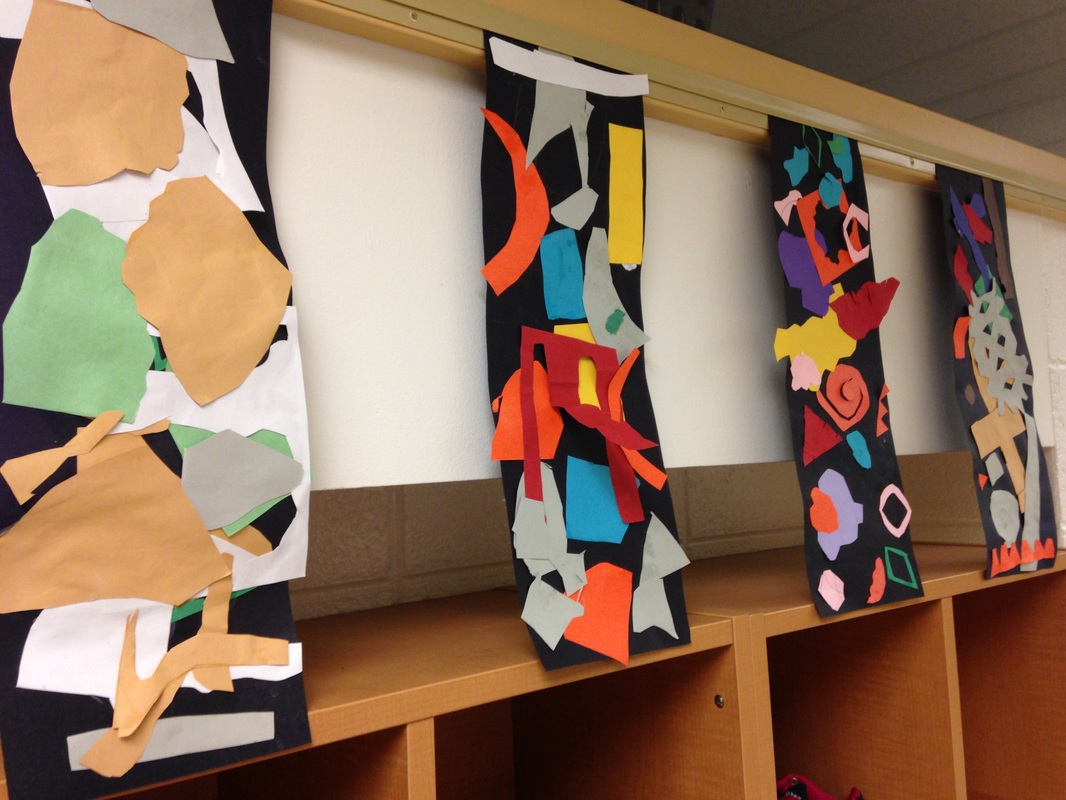
 This was a quick one-day project about Georgia O'Keeffe. Believe it or not, she was from Sun Prairie, WI! That blew the kids' minds. We talked about how Georgia's paintings depicted enlarged flowers and because of their size those flowers became the emphasis/focal point of the artwork. We drew out a flower shape, really making sure that our flowers were HUGE! We also talked about how good artists having things come off the edge of the paper. After they drew their flower, they sharpie'd and then erased the pencil lines. We re-touched on the watercolor technique wet-on-wet. This was a method that we used on our fall leaves earlier in the year. We combined this painting technique with warm or cool colors to make these beautiful flowers! 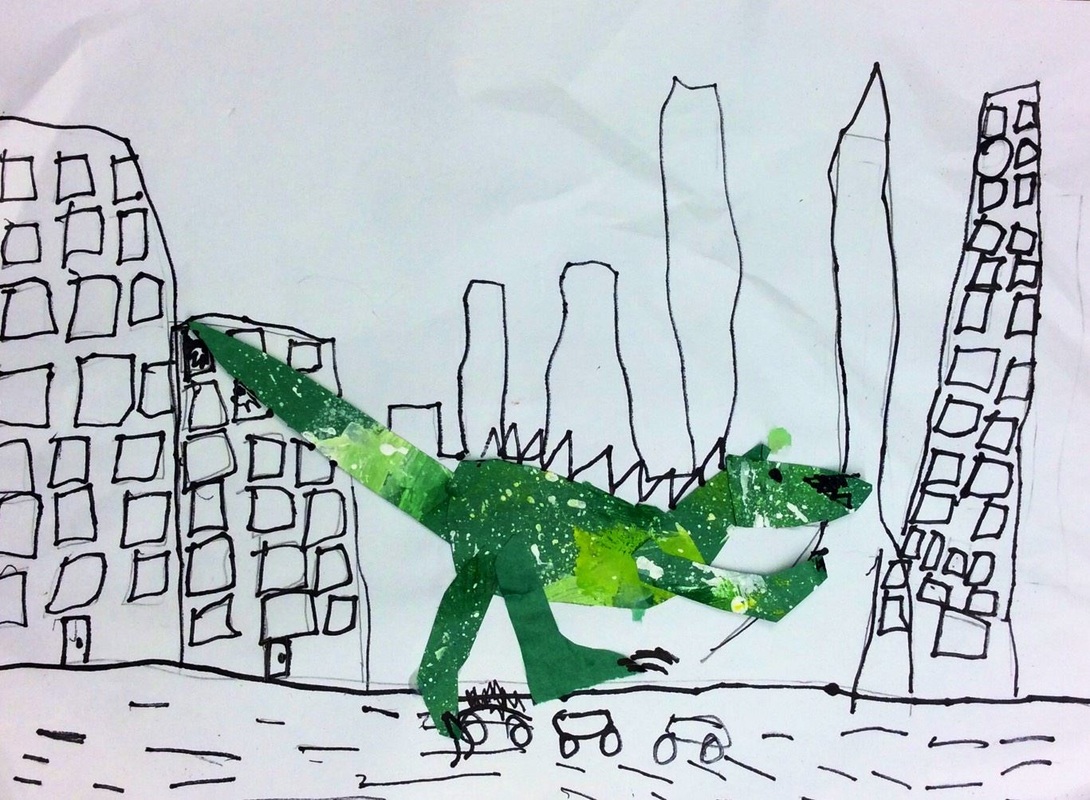 Dinosaurs and architecture?! Yes please!! We read the book If the Dinosaurs Came Back and used that as inspiration for this project (as well as whoever it was that I saw posted this). We recapped on the difference between geometric and organic shapes, taking note that cities have a lot of geometric shapes. After drawing and sharpie'ing their cities. They created a dinosaur of their choosing out of some scrap paper. Lastly, they added some details to their dinosaurs. When they finished, they were asked to write about the topic "If the dinosaurs came back..." It made for some pretty funny things that they would do with the dinosaurs! 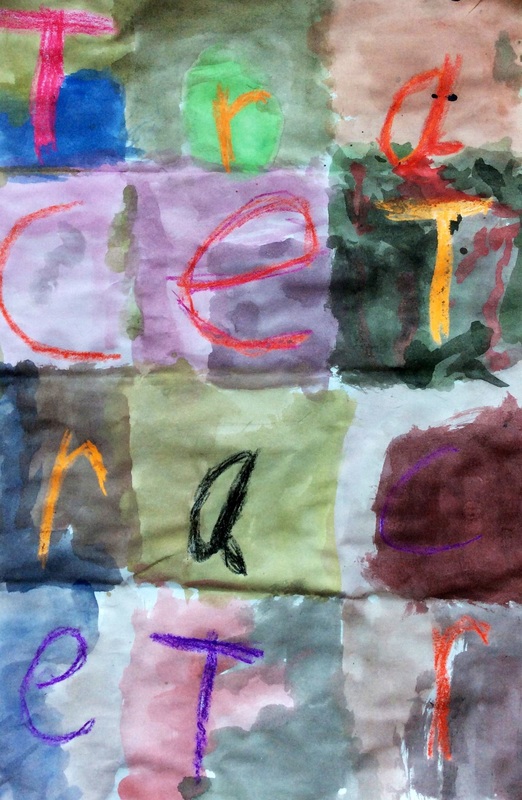 Kindergarten and 1st grade have been learning about Jasper Johns! Jasper Johns is an American Pop Artist who liked to make artwork of things that people had never really thought of as being art before, such as numbers, maps, and flags. His number paintings are often arranged into a grid like the picture above. I used this as motivation to do an artwork about students' names! Students first had to fold their papers twice in each direction (4 total folds) so that they would get 16 squares. They had to write one letter of their name in each square with a crayon, all the way until the end of their paper. I emphasized that they should go over their names a couple times so that their names stuck out from the paint a bit. Next they got to do my favorite thing, PAINT! We used tempera cakes to create tints and shades. A tint is any color that has white mixed with it, such as pink. A shade is any color that has black mixed with it. Students were to use two different colors in each square. These look great hanging above their cubbies! 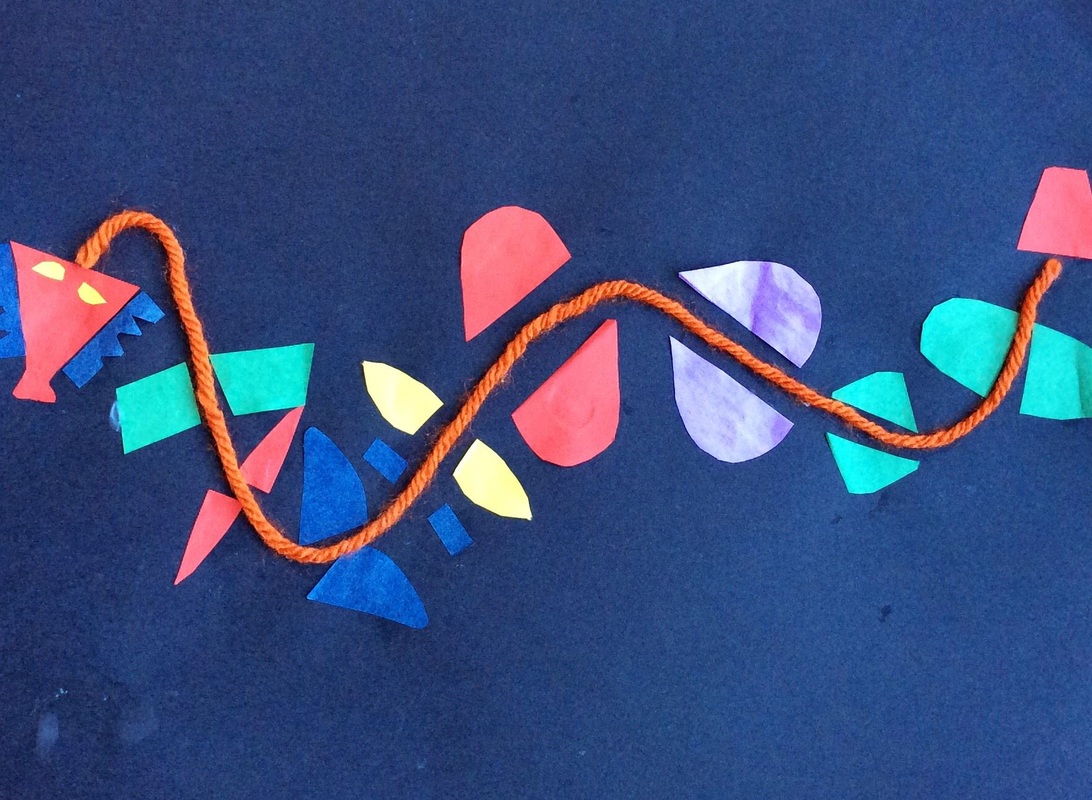 So we did this project a while ago in celebration of the Chinese New Year on February 8th. We talked about how there are 12 animals that rotate each year and how those animals represent certain characteristics in people. We also learned a bit about the significance of certain colors to the Chinese as well as a bit of history regarding the Chinese New Year. We started of by gluing down a piece of yarn onto our paper. Then we talked about symmetry and how things that are symmetrical are the same on both sides. We discussed some things that we see often that are symmetrical like people's faces and butterfly wings. After making a head and tail for their dragon, students were asked to fold pieces of paper in half and cut out various shapes. This would create two of each shape. They were then to glue one of each shape on either side of the yarn, making it symmetrical from the head all the way back to the tail. For this project, we checked out Jim Dine. Jim Dine is an American Pop Artist who was born in 1935 and is still alive! The kids love to learn about artists who are still living. Pop art is an art movement in which artists make art about things that are POPular. Mr. Dine chose to make art about hearts. The image of the heart is an iconic image that is recognized world-wide. I'd say that definitely falls into the "popular" category. Although we were a little late, I thought it would be nice to do an art project for Valentine's Day. 1st grade was SOOOOOOO excited to finally get to work with clay. Before the project started, I went ahead and used a cookie cutter to cut out some hearts from the clay. The hearts would act as the base to what the students would be doing. On the first day of the project, I introduced Jim Dine and clay to the students. Each student was given a heart that had been cut out of clay. I then showed them how to make coils (clay spaghetti noodles) by rolling the clay between their hands/table. These coils were then rolled up into little spirals. We attached the spirals to our clay heart base by a technique called "slipping and scoring." This is when you scratch up the two clay surfaces and rub a little water on them. This helps the two clay pieces to stick together. If you do not do this, the clay will probably fall apart in the kiln (clay oven). When I long-term subbed for Tasha Newton in Fall Creek, she showed me that you could slip and score clay using a toothbrush so that's what I had my students do. This makes slipping and scoring SOOOOO much easier. Any little spots that didn't have clay coils, students were to attach a small ball of clay. While the clay dried and was put in the kiln, we worked on our backgrounds. I made the backgrounds beforehand so i didn't have to worry about students burning themselves with the hot glue gun. We talked about patterns and how that is something that repeats over and over. You can have a pattern of lines, shapes, colors, stripes, etc. We used tempera paint to paint our popsicle sticks all one color. We then added patterns on top of the base colors. For the final day of the project, we talked about contrast. If something has high contrast, it means that two things are nothing alike (black and white, red and green, big and small, smooth and rough, etc). If it has low contrast, the two things are somewhat similar. We would be using high contrast on our project. Because our backgrounds had nice bright, saturated colors, our clay hearts would be a bit lighter so that they didn't blend in with our background. We painted our clay hearts using neon tempera cakes. The students were amazed that the clay soaked up the water and paint and was instantly dry after they had painted it! After they finished painting their heart, they used purple and lime green sharpies to add extra details to their backgrounds. We added shapes, stripes, polka dots, etc. Lastly, they glued four small heart-shaped beads onto their background. I glued their hearts to their backgrounds after school. I am not a big fan of working with clay, but I LOVEDDD how these turned out. Leif Erikson Day was on October 9th so of course we had to do a project about him! Throughout the project, we learned about Leif as well as vikings in general. It blew their minds when they found out that vikings were real and not just a football team (Mr. Calvert's favorite team at that! Don't hate ya'll!). We learned that Leif was the first European to come to North America, 500 years before Christopher Columbus. 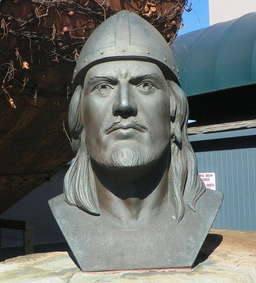 This project was another one of Cassie Stephens'. Her projects are just too cool not to do! Check out her blog. Seriously. Our first day of this project was probably the craziest day of art in my life. Students were given a large sheet of paper in which they first sponge painted white on to. Then they chose two other colors to sponge on top of their white. Next, they took a 9x12 sheet of white and green to the back counter where they learned to dry brush from the center of the paper out to the edges. When dry-brushing, they started with green paint, then yellow, and lastly white. All of this in an action-packed 45 minute class period! Oofda! Mr. Calvert slept well that night! The second day of the project, we tore our dry-brushed papers the long way. Then we layered these papers, starting in the center of the paper and working our way down. This created a grassy hillside for our viking. Next, they used a tracer to create a body and then cut out and glued their own picture onto their viking's head. The next two class periods were spent adding details to our vikings such as shields, belts, buckles, boots, beards, braids, etc. I love how well these turned out. They're so stinkin' cute!  So this was a project that I got from a super rad teacher named Don Masse. He runs the Shine Brite Zamorano blog which is one of my faves! I had the privilege of meeting him during an art Twitter chat that I recently hosted. So we kicked off this project by watching videos of ice caves. We also talked about Wisconsin's ice caves on the Apostle Islands. We began the art-making by talking about secondary colors. Secondary colors are made by mixing two primary colors together. So the secondary colors are purple, green, and orange. Although we only used purple for this project, I thought it would be a good idea to at least talk about the other two. Students painted their paper red and then painted blue on top of it, mixing the colors right on their paper to make purple. Depending on how much blue or red they used, could effect whether they ended up with a blue-purple or a red-purple. The first day, we also tore a blue paper into triangular shapes to create icicles. We added a blue shadow with chalk to the same side on each icicle before gluing them down. This was a SUPER messy day because the students were gluing their icicles onto wet paint. The second day, we continued to to tear paper to add icicles. This time we tore grey paper and then white. Some of the icicles we began to crumple up. This created texture in our art. Texture is how something feels or how something looks like it feels. After adding their chalk shadows and gluing them down, we got a great sense of space in our paintings. Now I'm not talking about that space up in the sky, ya'll. Space in art is the illusion of depth. We talked about this on the second day. Because the blue icicles were in the back, and then the grey, and then the white, it created the illusion of depth because the darker colors were furthest away. We also talked about how overlapping creates a sense of depth. This lesson was packed full of art content and they rocked it once again! Mr. Pollock was a painter who lived from 1912 to 1956, ultimately dying in a car crash at the young age of 44. As most of you probably know, Jackson was famous for his "drip paintings." Oftentimes, people exclaim "Well I could've done that!" But the reason Mr. Pollock is famous is because he was a pioneer of the method during a time when people were dabbling more and more into abstract art. He was known for splattering, spraying, squirting, dripping, and pouring paint onto his canvas. He used all sorts of materials to do this such as brushes, sticks, spatulas, spoons, etc. He worked with his canvas on the floor so that he could "dance" around it as he worked. Throughout this project, I made sure to emphasize that our paintings would NOT look like Pollock's. We were just using a few different techniques that might look like something he would do. On the first day of the project, we GENTLY splatter painted white stars onto a black background. We also looked at rocket ships before drawing one and tracing them with a marker. Lastly, we used tempera cakes to paint our rocket. The second day of the project, we cut out 4 or 5 different sized circles. We put a dot of glue stick on the back of each circle and placed them onto a large modified picture frame that I had made. I had removed the glass from the frame. Students could then lightly glue their circles down to the back of the picture frame. Then we placed marbles and paint into the frames. The frames were large and required two students to gently roll the marbles around the frame, creating streaks of paint across our circles. These would later become our planets. I also took a picture of each student while they acted like they were floating. On the final day, we cut out our rocket ship and glued it on. We also glued down our planets onto the background. We cut the picture of ourselves out and glued that down too. So much cutting and gluing this class! Lastly, they used a silver marker to add a tether between their rocket ship and themselves. 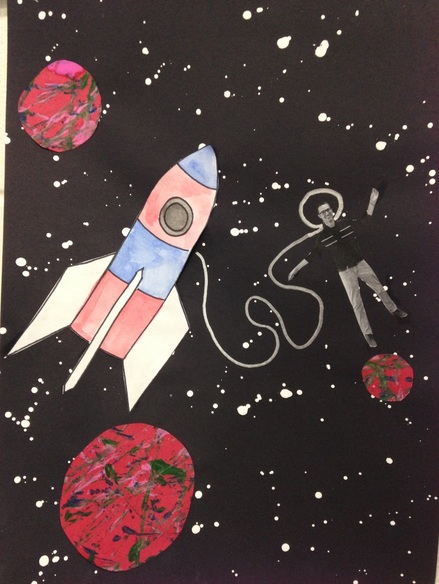 Usually I would put student work here, but I don't think I should be posting pictures of students' faces. So this is what the outcome looked like. For this project, we checked out Henri Matisse's work. Matisse was a French artist who is most well-known for the paper cutouts (collages) he made. He used a mixture of both organic and geometric shapes to create his works. Late in life, he developed cancer. After a botched surgery, he was left wheelchair-bound and his vision was beginning to fail him. He oftentimes made art from the comfort of his bed, bringing the outside world into his room through his artwork. We started off the project watching a couple videos about Mr. Matisse. Then we discussed the difference between organic and geometric shapes. This was the big focus of the project. I explained to them that organic shapes look like blobs of spilled milk and geometric shapes are shapes that usually have names (circles, squares, diamonds, etc). The first day of the project was spent only cutting out shapes. I stressed that their cutouts should be various sizes, colors, and a blend of geometric and organic shapes. Most of the second class was spent cutting out shapes as well. I allowed them to start gluing shapes onto their black background with the last ten minutes of class left. I emphasized that they needed to lay out their shapes first though to get an idea of where they wanted their shapes at. Students were welcome to keep cutting if they felt they needed too, which many did! On the final day of the project, the students finished cutting out any shapes that they needed and glued them onto their background. When they were finished, they took a quick quiz on Mr. Matisse.
|
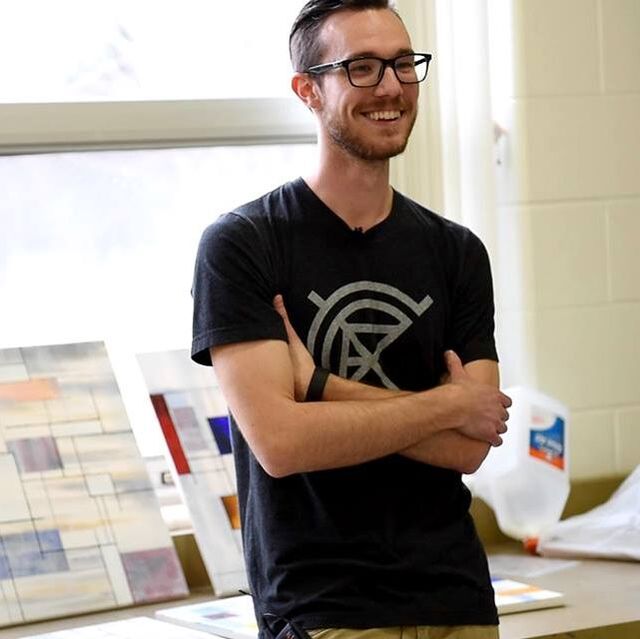
Devon CalvertHarmony and Consolidated Elementary Art Teacher in Milton, WI. UW-Eau Claire graduate. WAEA President. Apple Teacher. 
Archives
April 2018
Categories
All
|


 RSS Feed
